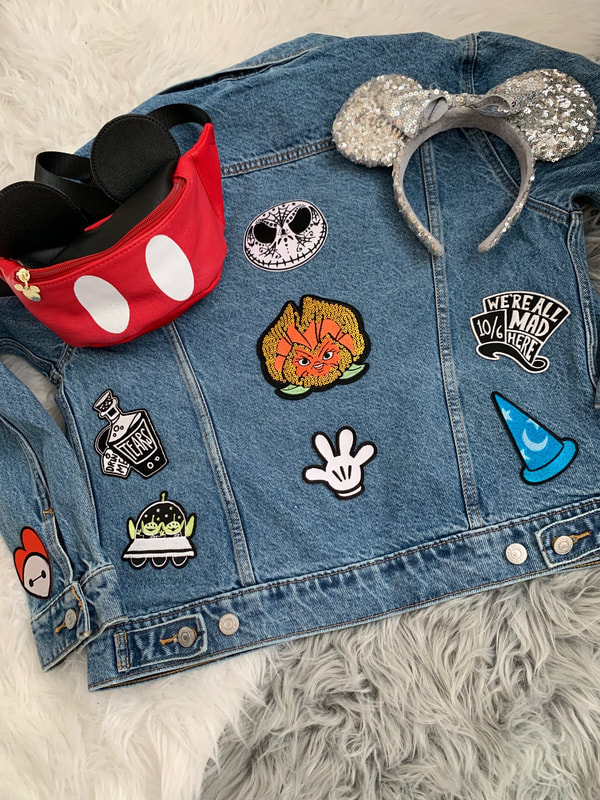
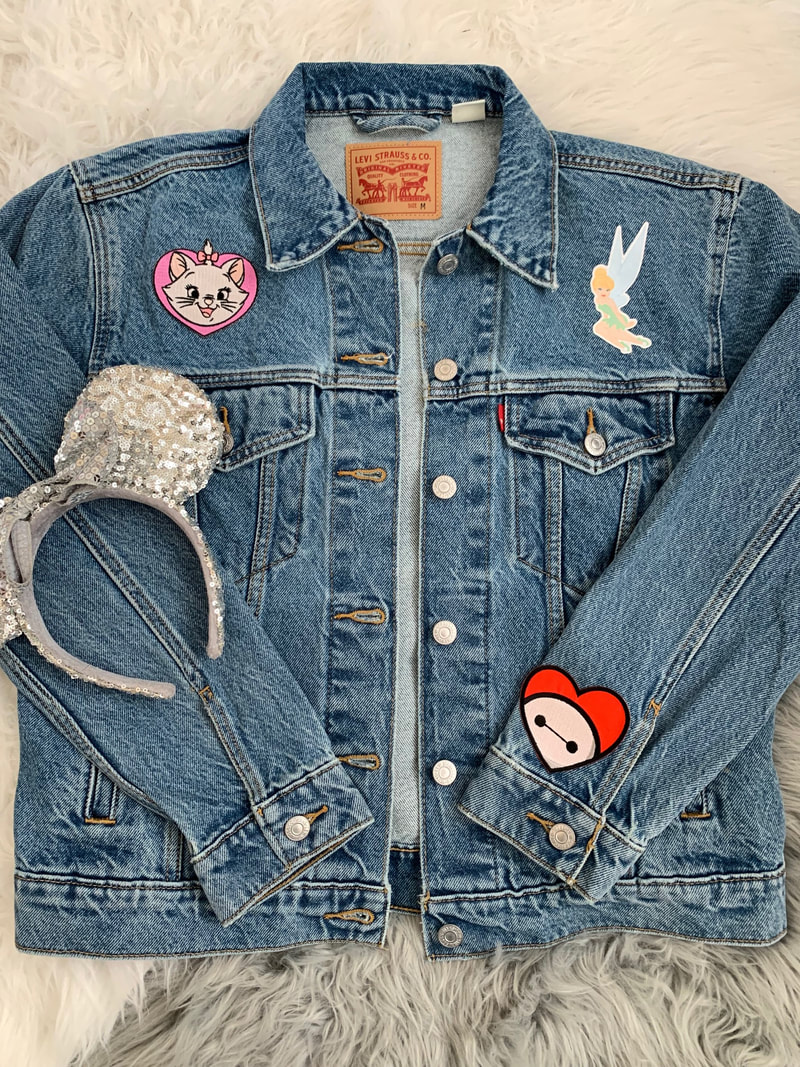
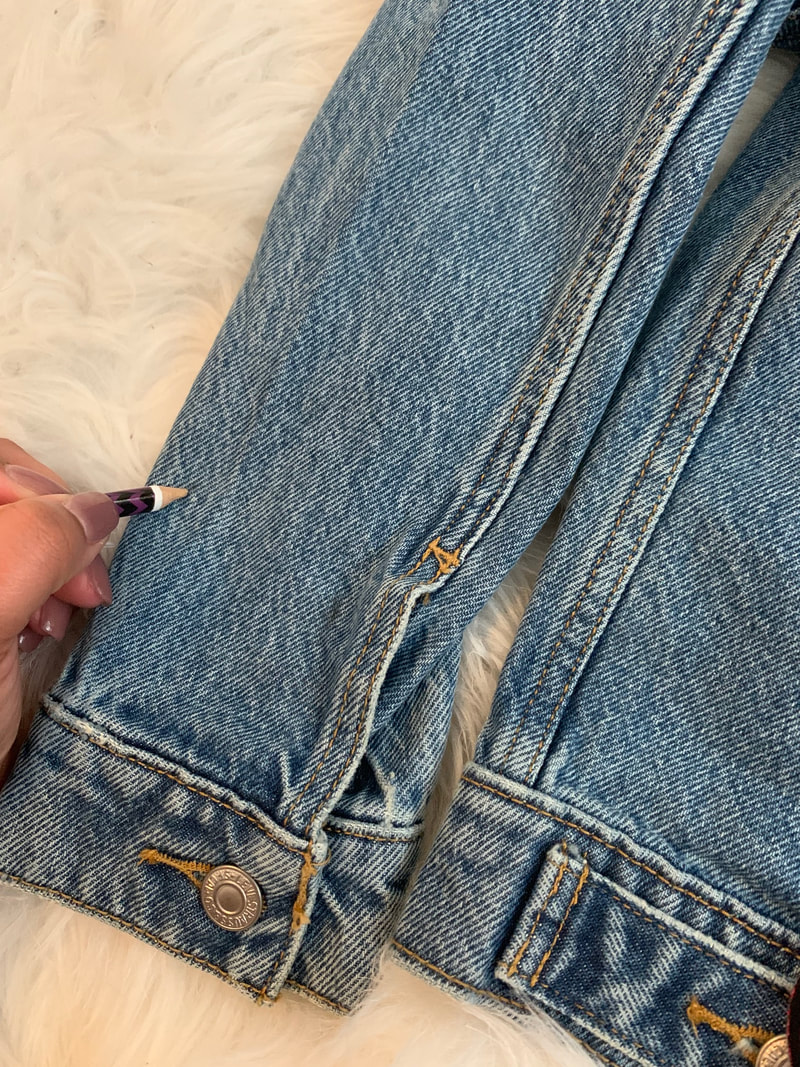
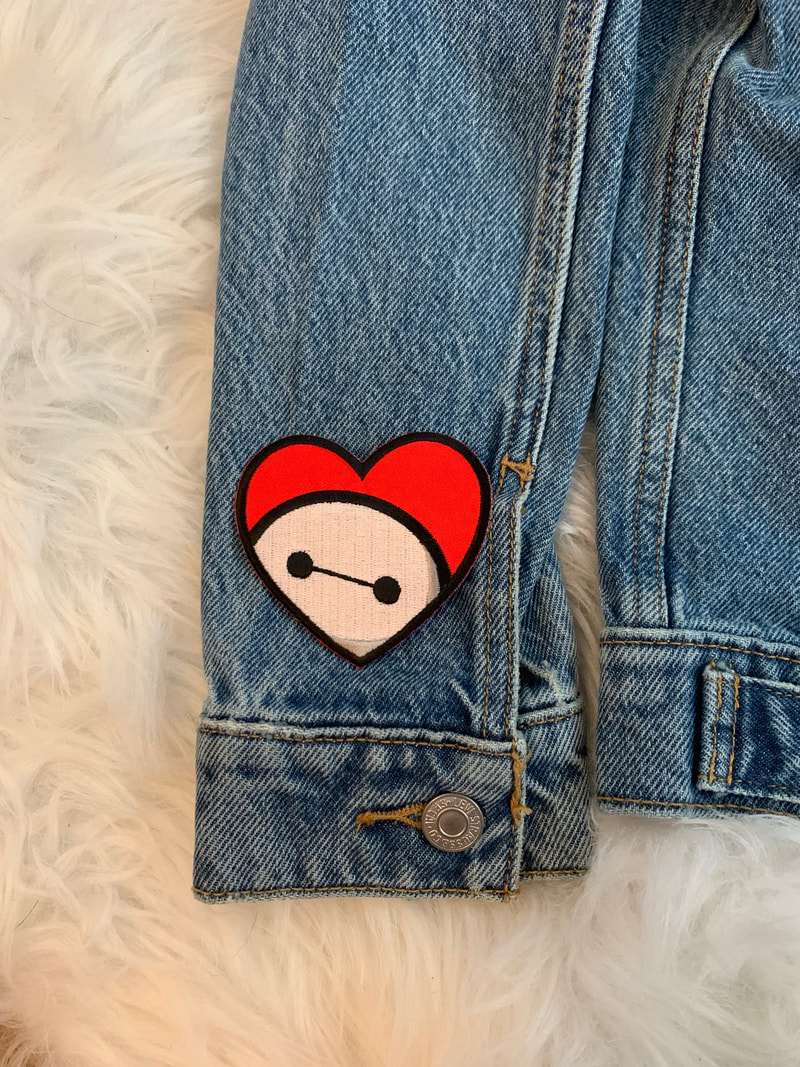
If you follow me on Instagram, or have read my about page, then you already know I am a HUGE fan of Disney! I've wanted a Disney patch jacket for a while, but couldn't find the right one, so I thought I would make one myself. Keep reading to see more photos of this lovely jacket, where I bought everything, and how to easily apply patches to your own DIY jacket! Step-By-Step Pictorial:STEP 1: Picking your Material Not all materials work well with iron-on patches and certain delicate fabrics such as nylon, spandex, and polyester may be damaged by the heat of an iron. The best materials to use with iron-on patches are cotton, denim, and work-out material. I chose to work with this Levi's boyfriend jacket because I've had experience working with patches on denim before and loved how it turned out! This boyfriend jacket in general is also just really cute and I love the oversized fit (which also gives more room for patches!) 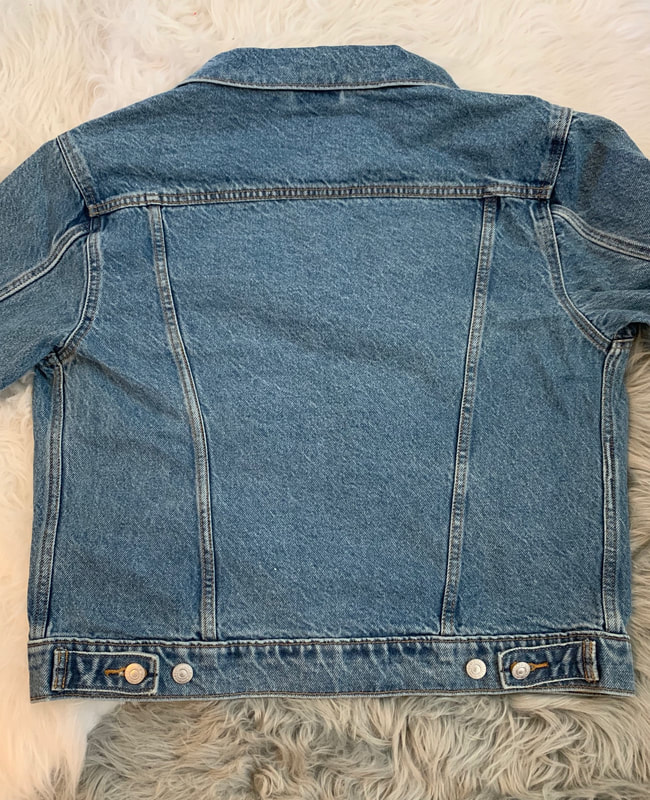 STEP 2: Planning If done right, these patches can stay on for years (and even permanently if you take care of your item). Therefore, you'll want to plan out where all your patches will go before you apply them and they can't be moved around. I knew that I wanted the Baymax patch on my sleeve, so I put the jacket on and held my arm in front of me moving the patch around until it was where I wanted it to be. I then marked this area in pencil, so I would remember. Next I placed the two largest patches in the middle (Jack and the pansy) and then moved the rest of the patches around a few times before making my final decision. Don't forget to snap a pic before moving them all!
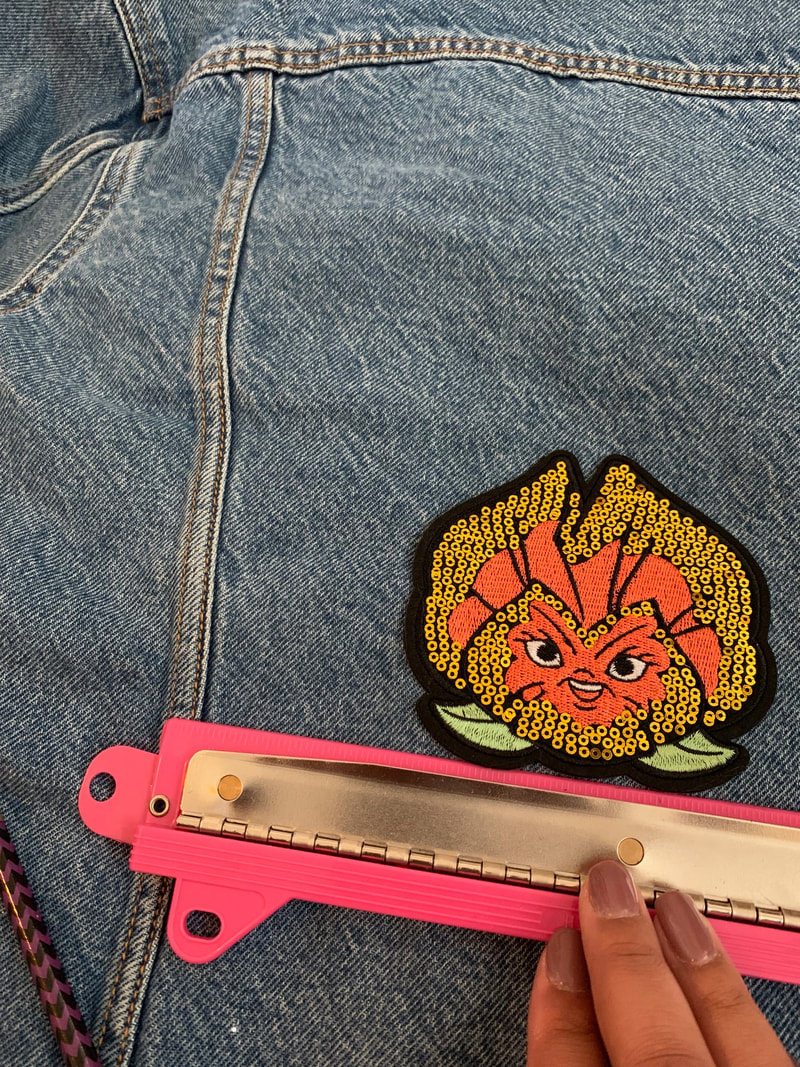
STEP 3: Applying your Patches Now for the fun part! You'll want to start by removing the patches so you can work with one at a time. I applied my two largest patches first because I wanted them to be perfectly in the middle. I used a ruler for this part and measured from each edge of the jacket to the center of the patch moving it slightly until the numbers were the same. You should put a press cloth between the patch and the iron to protect the fabric from the heat and the iron from the patch. If you don't have a press cloth, a sheet works perfectly! I had my iron on the cotton setting and switched between circling around the patch and holding the iron in place for about one minute and then going over the edges for another minute. Finally, make sure to iron the inside of the your jacket, t-shirt, etc. on the other side of the patch using similar motions and simply repeat this step until you've applied each one. It took me about an hour to apply every patch.
Step 4: Final Touches Once you apply all of your patches, you'll want to check that the edges aren't lifting and re-apply the iron where necessary. I also turned my jacket back over and ironed the entire inside one more time just to be safe. Remember that ironing a thick denim will take more time than a cotton t-shirt, so make sure to take your time with this to avoid your patches falling off later. I linked as many patches I could find (I've had some for awhile) and a few more favorites below!  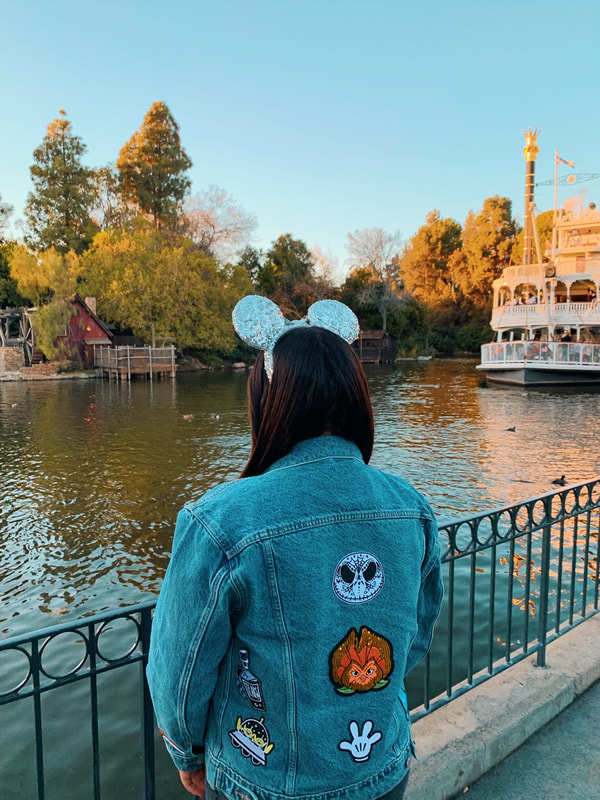 *My ears were purchased from the park and you can purchase the fanny pack here. As you can see, there's still plenty of room for more patches and I'll continue to add more as I find them. I bought all of mine at either Hot Topic or BoxLunch, but you can find great patches in Etsy stores as well that not many people will have. The more unique, the better! I hope you enjoyed this DIY pictorial! 
1 Comment
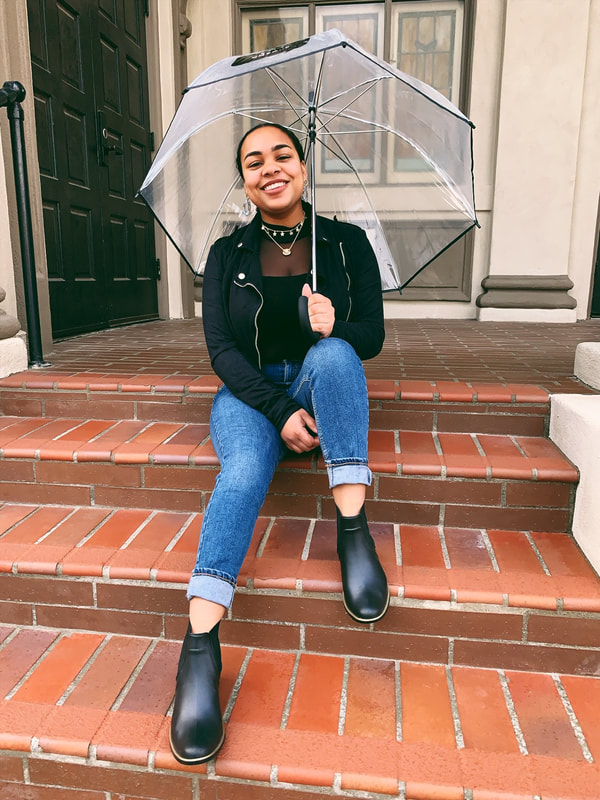
Hello everyone and happy Saturday! The rain has been crazy this past week and many of the streets near my house are currently flooded. However, on Wednesday, it finally calmed down long enough for me to go out and shoot! Keep reading for outfit details and a 'Get the Look.'
The Outfit:
While it was raining, it wasn't exactly cold, so I didn't have to layer up as much as usual. I really took advantage of this by wearing my chelsea rain booties from Kate Spade! I love these boots and I rarely get to wear them because it either never rains (socal problems) or it's raining too hard and short boots don't cut it. I folded up my Topshop jeans to show off the shoe which also gave me a bit of height. These jeans are so comfy and come in petite (hellooo) and tall sizes, so you're likely to find a pair that fits you. I went with a bright blue denim to bring some color to my outfit (and the gloomy day, ha!).
I added a high-neck top as I've been loving them lately. These tops easily transform any look to make you appear both stylish and sophisticated. As a bonus, your necklaces will stand out and you won't have to worry about them sneaking underneath your top. Whenever I wear this cut, I like to wear my hair pulled back either in a low bun or ponytail. This way, you won't lose your neck (If you watched America's Next Top Model, you'll understand the importance of not losing your neck!) I always wear a statement earring with this hairstyle as, one, you can actually see them so why not take advantage and, two, it adds something to an otherwise simple look up top. I chose a pair of gray oval earrings to complement the weather. Finally, I completed the look with a black moto jacket and a clear bubble umbrella to show it all off (: 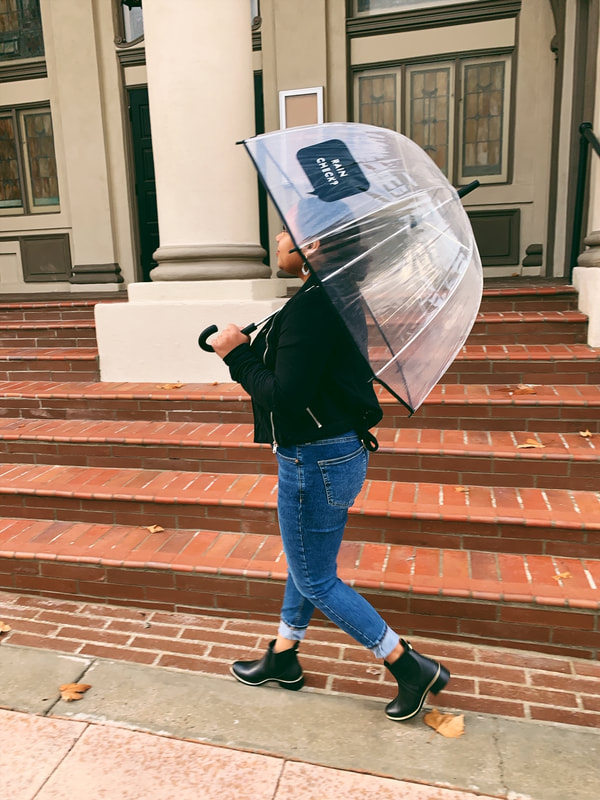
Get the Look:
Thanks for reading and I hope you all have a lovely weekend!

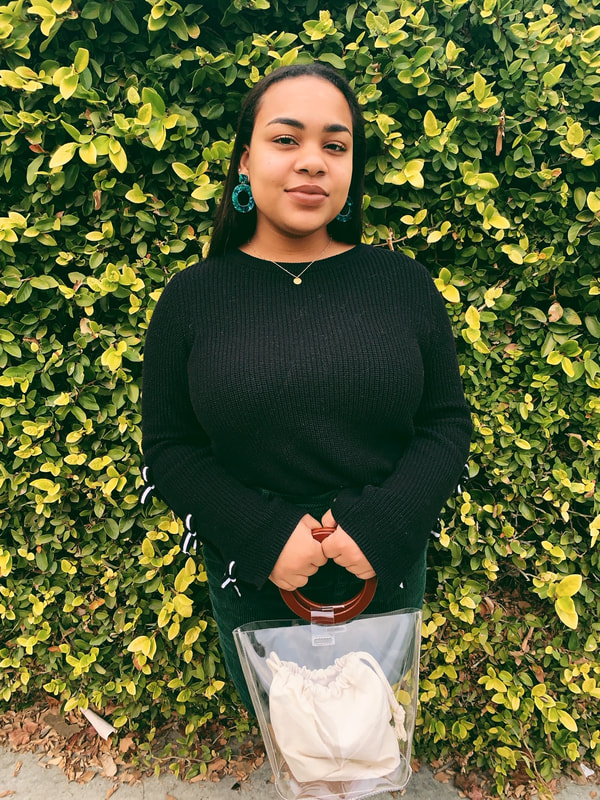
Hello, everyone! Today's blog is my first of the new year and I'm so excited to share my first winter look with you. This post is all about upping your sweater game. Sweaters are easy to throw on when it's cold out, but year after year can become a little tired. One easy way to switch up your look is with a detailed sleeve. Keep reading for outfit details and more unique sweaters to stand out this season.
Get the Look: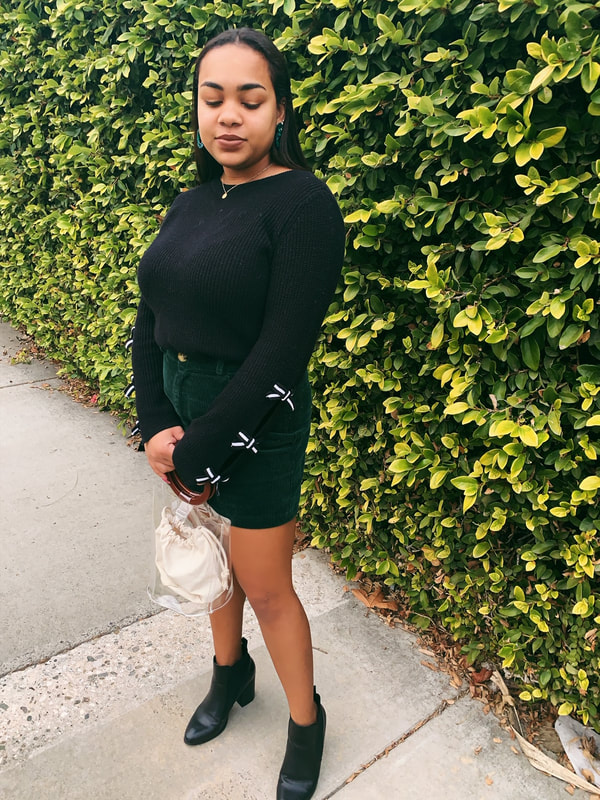
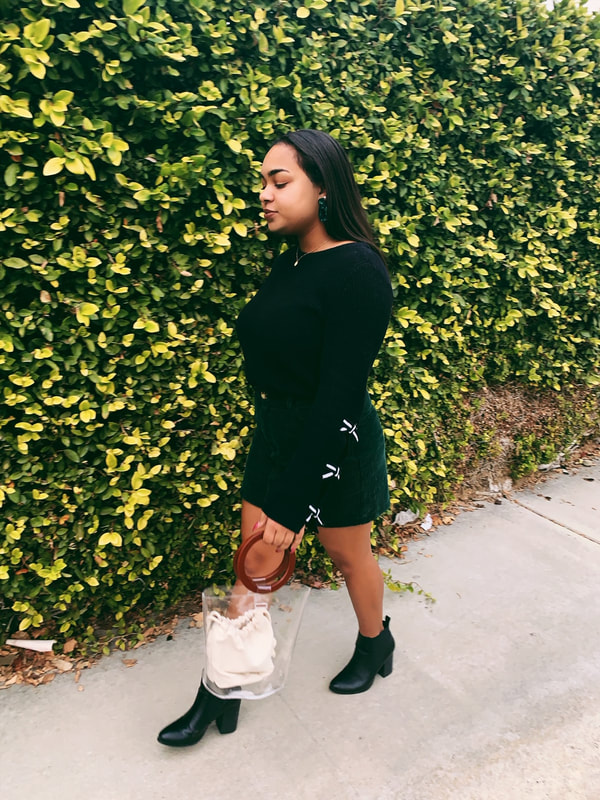
I got this sweater for Christmas and immediately fell in love with the bow sleeves. I styled it with my forest-green, corduroy skirt (similar). I've been obsessed with corduroy lately and the material makes a skirt appropriate for winter. It also looks great with tights if you desire a bit more warmth! I wanted to tie in the green with my earrings (a subtle, yet necessary addition to the look). These green-tortoise shell earrings from Amazon were perfect! I completed my outfit with my favorite pair of black boots to dress up the look and my clear mini-tote (matches everything!)
Try One of these:
Above are a few more great sweaters to choose from, but the mint color of the first sweater makes it my favorite! Would you try one of these? Let me know in the comments!
xx star |
ABOUTOn this page, you will find posts on daily outfits, style tips, and some of my favorite clothing brands. Categories
All
Archives
June 2020
|

 RSS Feed
