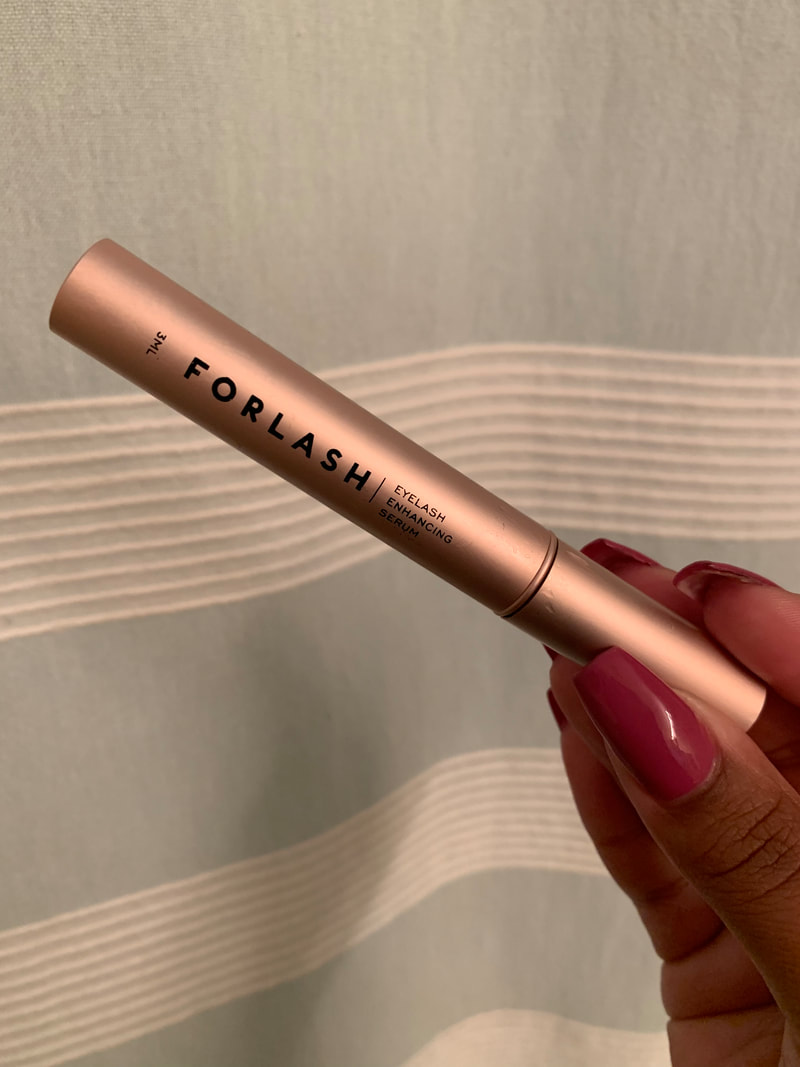
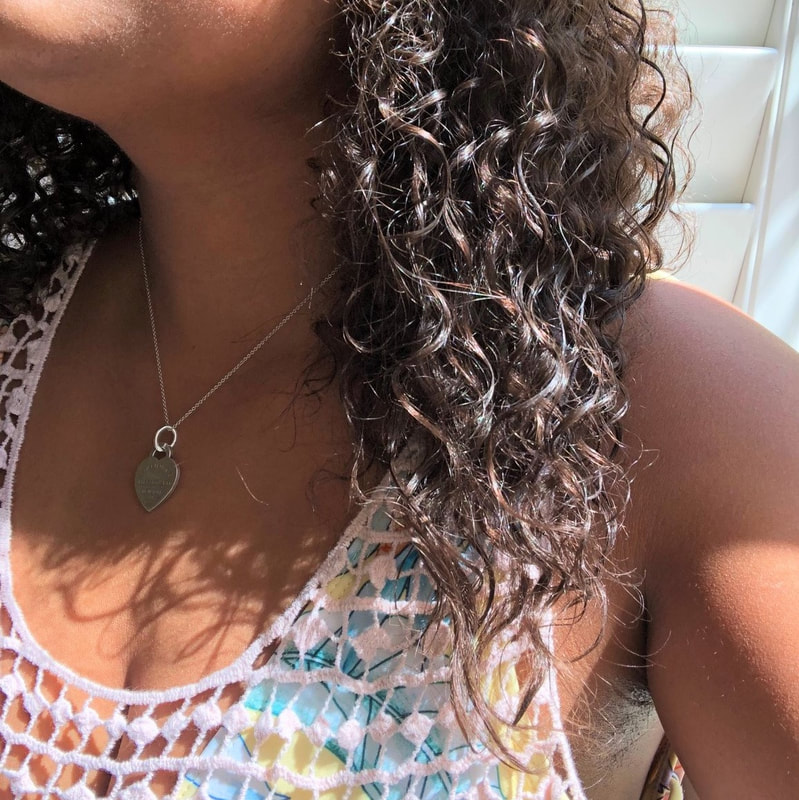
 Helloooo everyone and happy Friday! It's probably no surprise that I'm bigger on skincare than makeup if you follow me on instagram since I hardly wear it (with the exception of the occasional mascara and lipgloss). For the first time in my life, I've started doing an actual skincare routine that moves past me just washing my face! Today, I'm sharing my three favorite products from my routine that I use everyday and never travel without, so if you are interested in learning what they are and reading about a lash growth serum that really works (pics included!) then keep on reading (:
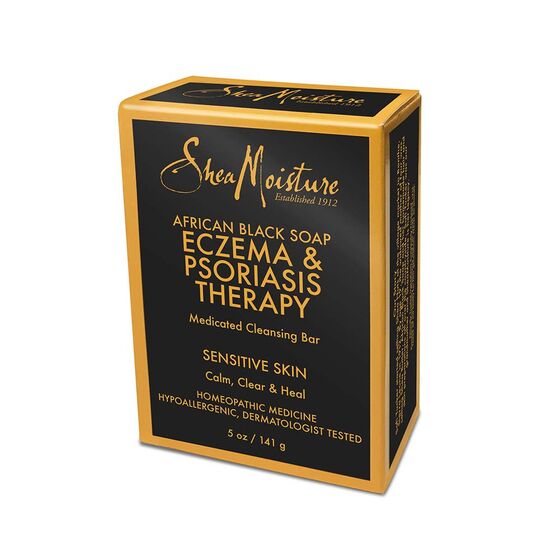
Do you recall that episode of That's so Raven where Raven's face swells up due to an allergic reaction to mushrooms? If not, then please go google it because that's how I felt my face puffed up this past June due to a reaction to who knows what (I'll save you from seeing THAT picture). I've never been allergic to anything so I wasn't sure what caused it or what to do. Whatever it was, it caused my face to swell, peel and flake, and my skin was extremely dry for days. My face is dry to normal on most days, but this was way more extreme. I purchased this soap in addition to the pairing lotion from Shea Moisture and my skin cleared up in a few days. I continue to use the soap daily and the lotion on my dryer skin days. I wash my face mainly at night as it benefits your skin when you limit washing your face to once a day. Benefits: 1. Doesn't dry me out or irritate already dry skin 2. Doesn't leave behind that soap scum feeling (it is a bar) 3. Easy to travel with (you can break a piece off to take!) 4. Non-abrasive 5. Not just for the face! Cons: 1. I can't tell you what it does for acne since I don't have it 2. It is a bar soap which may be a con if those aren't your thing (I don't mind it though!) Overall Thoughts: I think this is a great product as my skin is really sensitive to anything scented or abrasive (such as with other black soaps I've tried and anything that scrubs). Most importantly, even on my driest days, it does not burn my skin, specifically the area around my nose which seems to be affected the most. I was recently sunburned and the soap and lotion together did not irritate my skin either, but helped to soothe it. I can't tell you if it works to clear blemishes although it is advertised to, so I encourage you to read more reviews before testing it out! While I won't be sharing the initial photo of my swollen face, I did provide some from a few days after the initial reaction.  Skin is dry, textured, and peeling (Photo taken June 16th)  Skin is less dry, no longer textured, and the peeling around my nose has healed (Photo taken June 22nd)  TODAY | Skin is normal and smooth
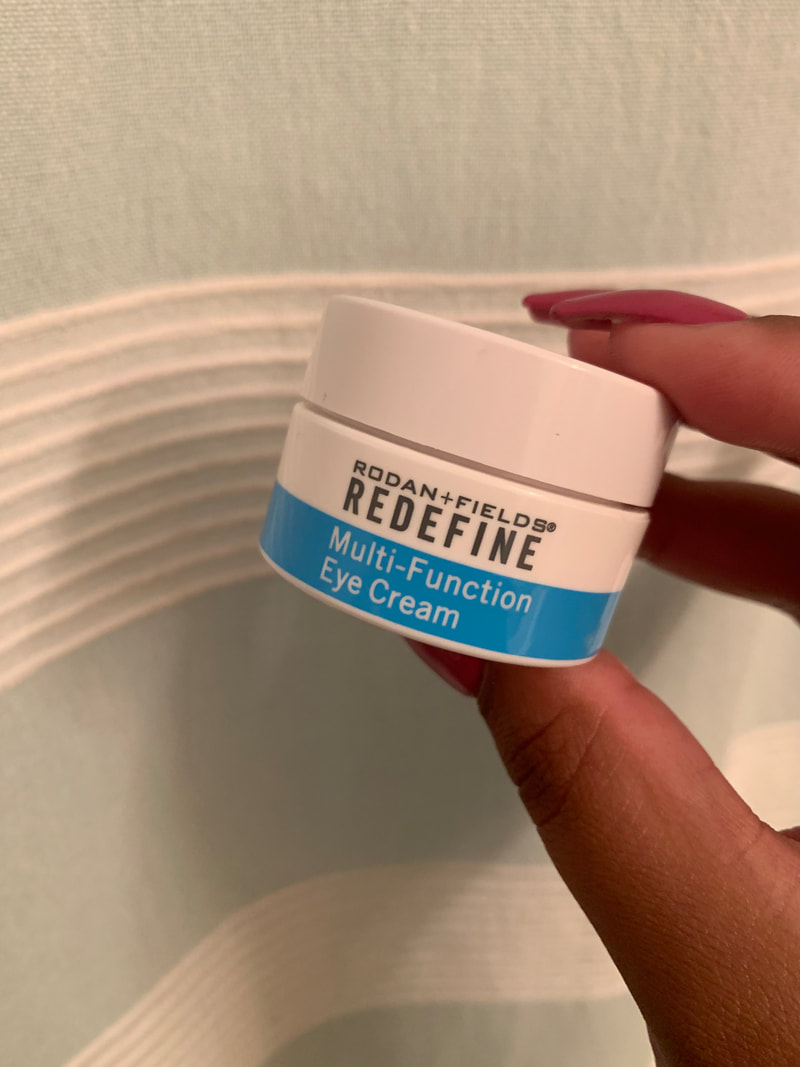
I discovered this eye cream through another blogger I follow on instagram just as I was searching for ways to naturally lift my hooded eyelid, and yes that is singular because ONLY my left eye was hooded. This was something that bothered me for awhile because one of my eyes always squinted more than the other and sometimes appeared closed when smiling in pictures. Even looking straight into a mirror, I could easily tell my left eye was significantly more hooded and closed than the right. This eye cream can also be used for puffy or dark circles under and around the eyes and to decrease the appearance of wrinkles/fine lines. I mainly wanted it for the lifting but figured, if it takes care of the other things, that's great! I was really only concerned with avoiding eyelid-lifting surgery (botox?) Idk, I clearly didn't even look into it because that stuff scares me lol Pros: 1. Actually gave my eyelid a natural lift 2. Long lasting (I've had the same container for three months and use it twice a day!) 3. Good for sensitive skin! Cons: 1. I haven't noticed a significant improvement with the appearance of dark circles 2. A bit pricey It was honestly so difficult finding before photos because I tend to avoid looking up while shooting due to this problem! So many good photos I couldn't post because of it *sigh* In the first picture, you can kind of see how my left eye is smaller, but I promise it was a lot more noticeable in person! Now, you can barely tell in person and I'm not noticing a difference between my eyes at all in my photos! Also, please excuse the spider bites on my head in all the after photos. I wanted them to be as recent as possible (today!) and of course I just HAD to get bit the night before...  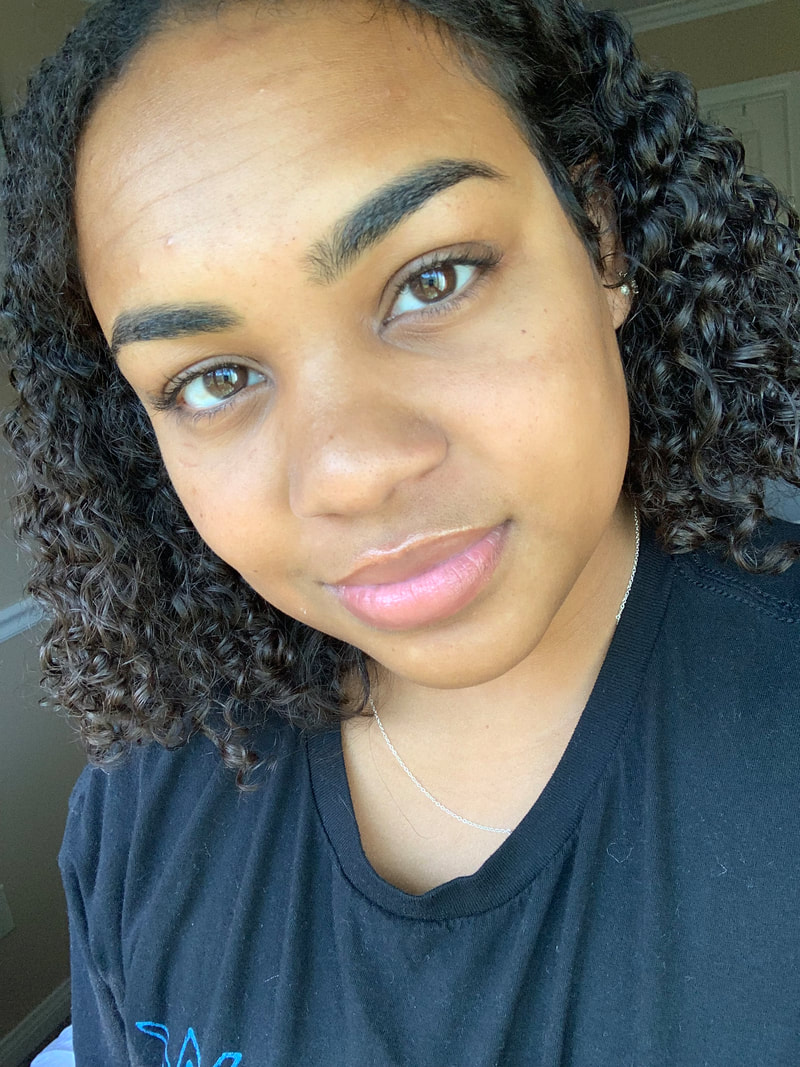
Now for my favorite product of all, the Forchics eyelash serum! Ironically, I discovered this product through an Instagram ad with before and after pics that just seemed too good to be true. Even after scrolling through a majority of positive comments, I remained suspicious because I thought they could be paid comments. Then I thought, what the hell! What's the worst that could happen? (and now that I think about it, my lashes could have totally fallen out which would be the worst thing buuuut thankfully that did not happen heh). I'm just going to include some before and afters for this one because the pictures speak for themselves. 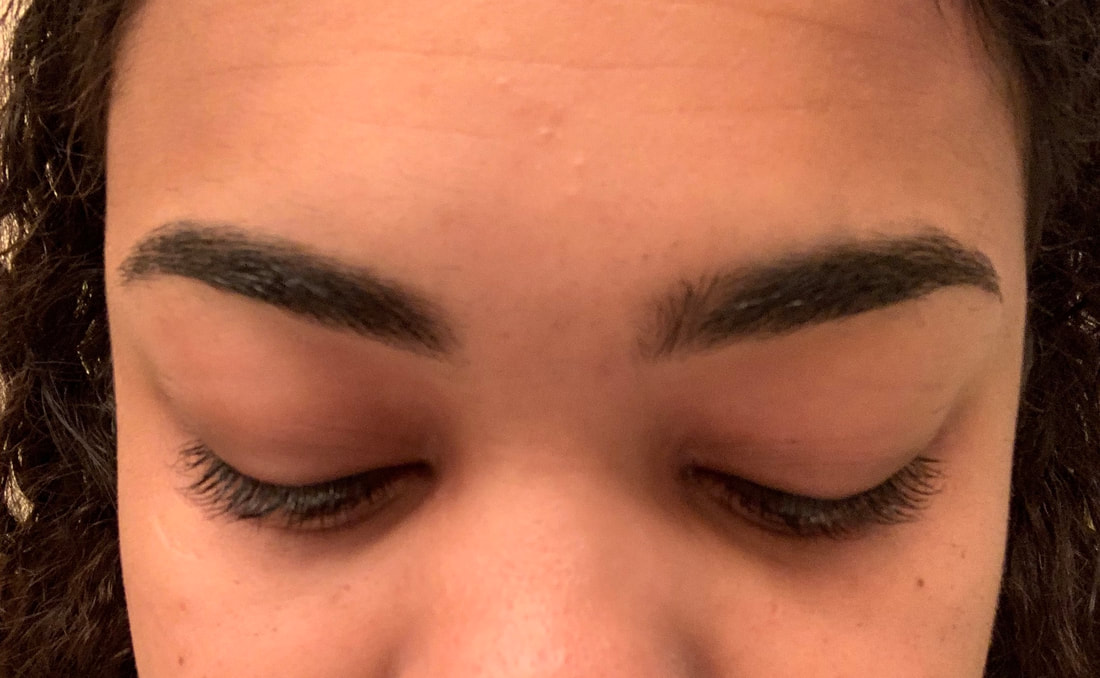 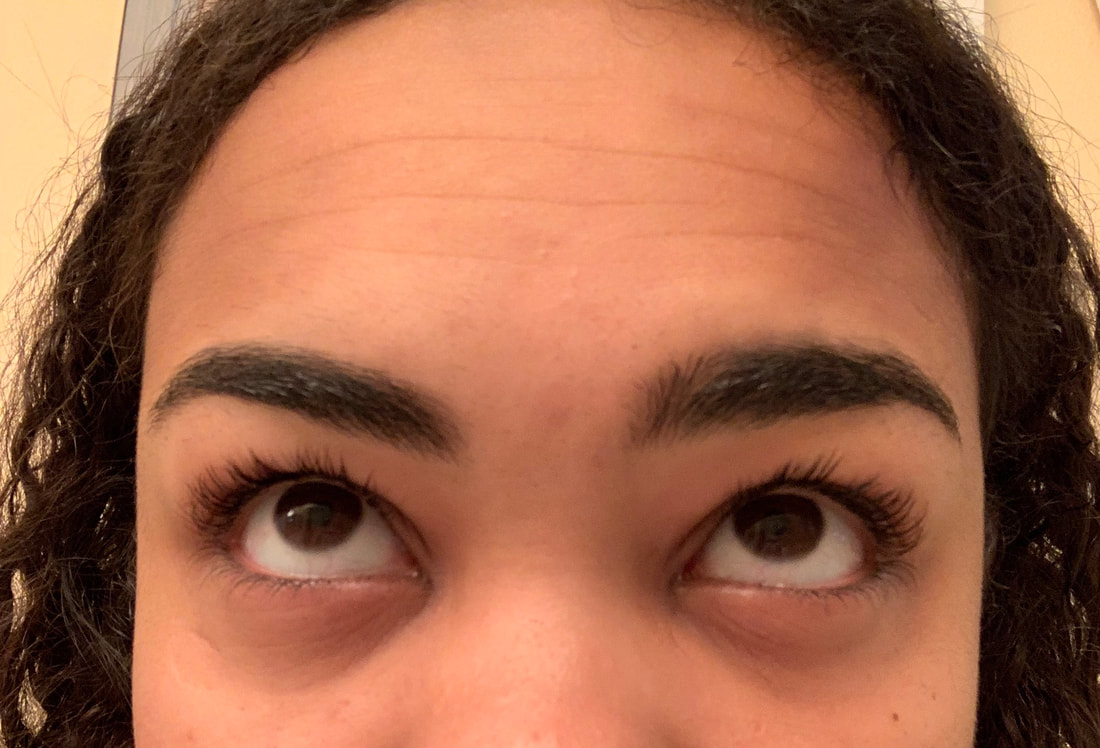 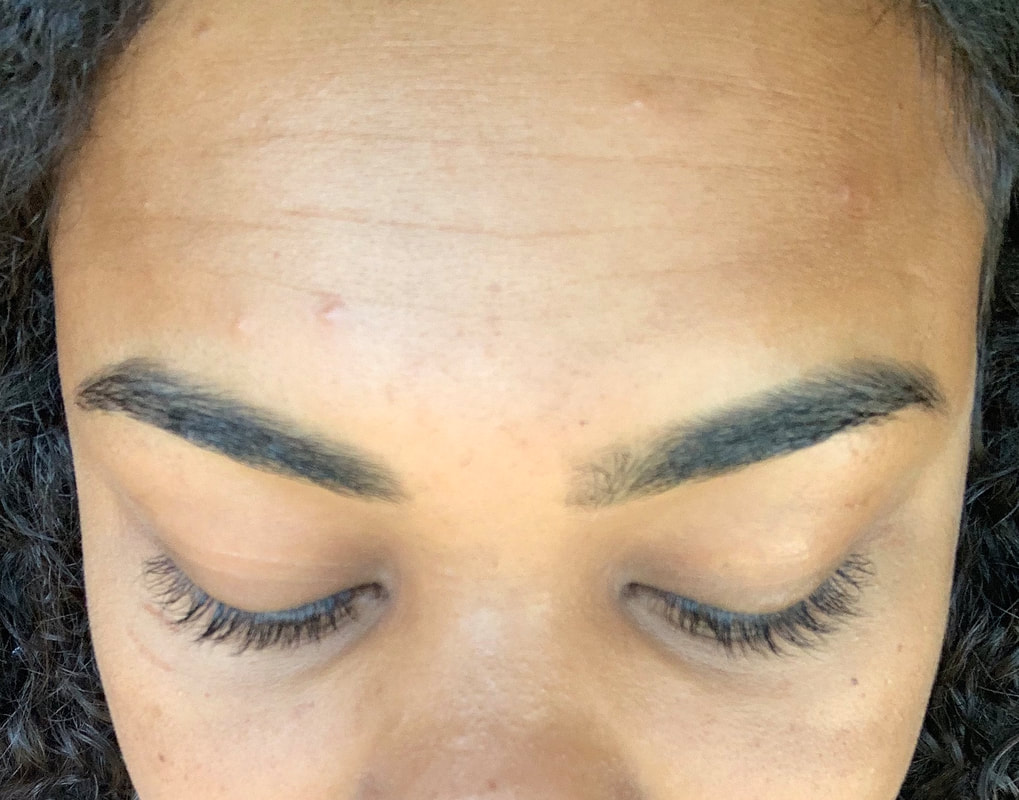 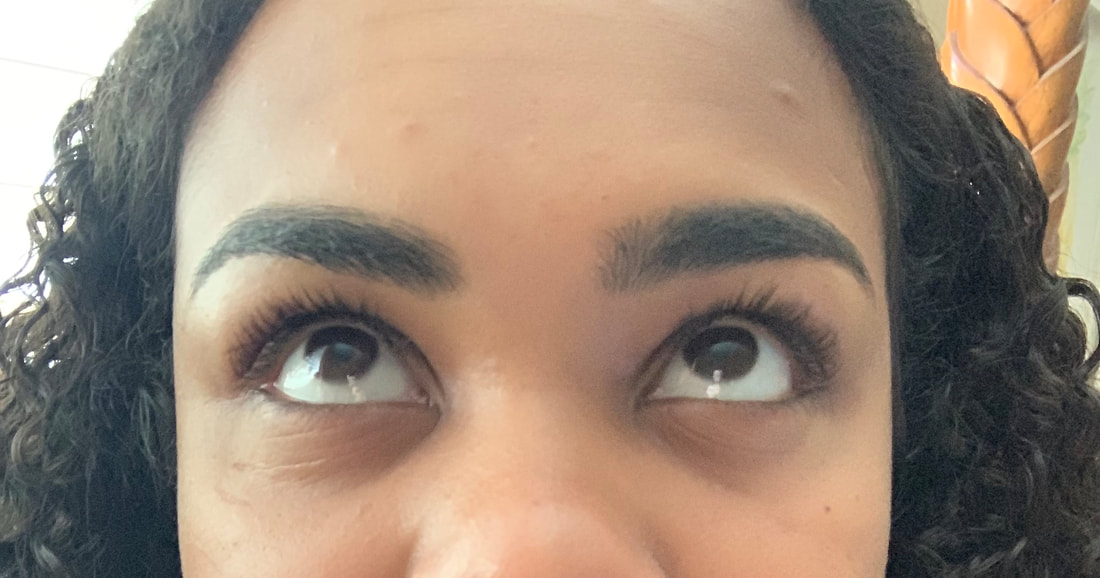 Do you see why the lash serum is my favorite?? My lashes are almost to my eyebrows! I also wanted to just say that this is NOT a sponsored post; I just wanted to share some products I've been loving (: Thank you for reading! 
2 Comments
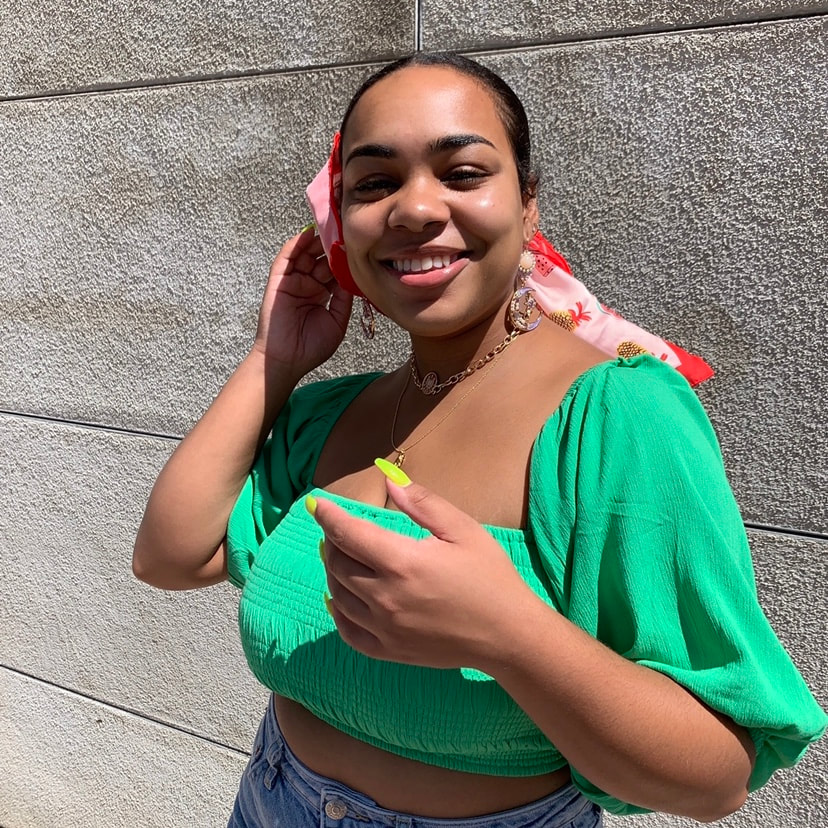
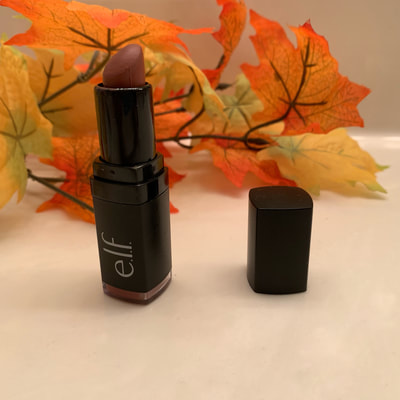
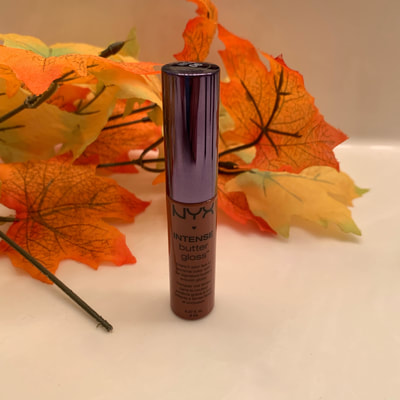
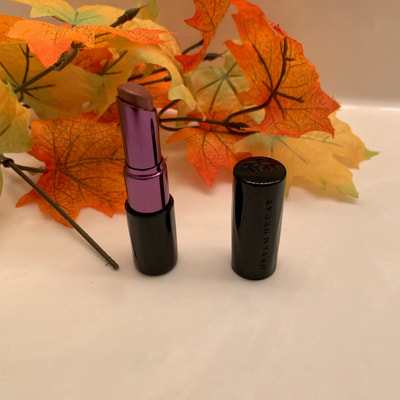
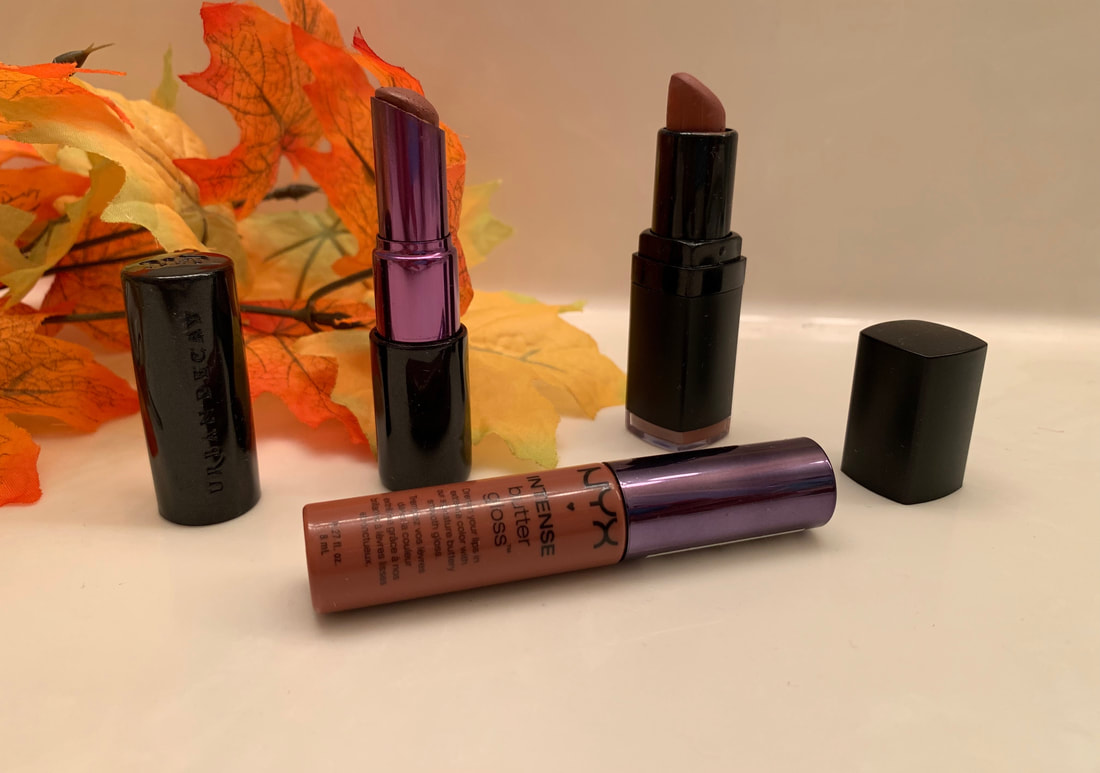 Hey guys! I hope your Halloween was great (: October really flew by, but I'm glad it's November because we're one month closer to Christmas (WOO!) Today, I wanted to share with you all my favorite fall lippies from lipstick to gloss. These are the colors I've been wearing practically everyday and all over my instagram, so keep on reading for swatches and links to my favorite shades this season! E.L.F. Lipstick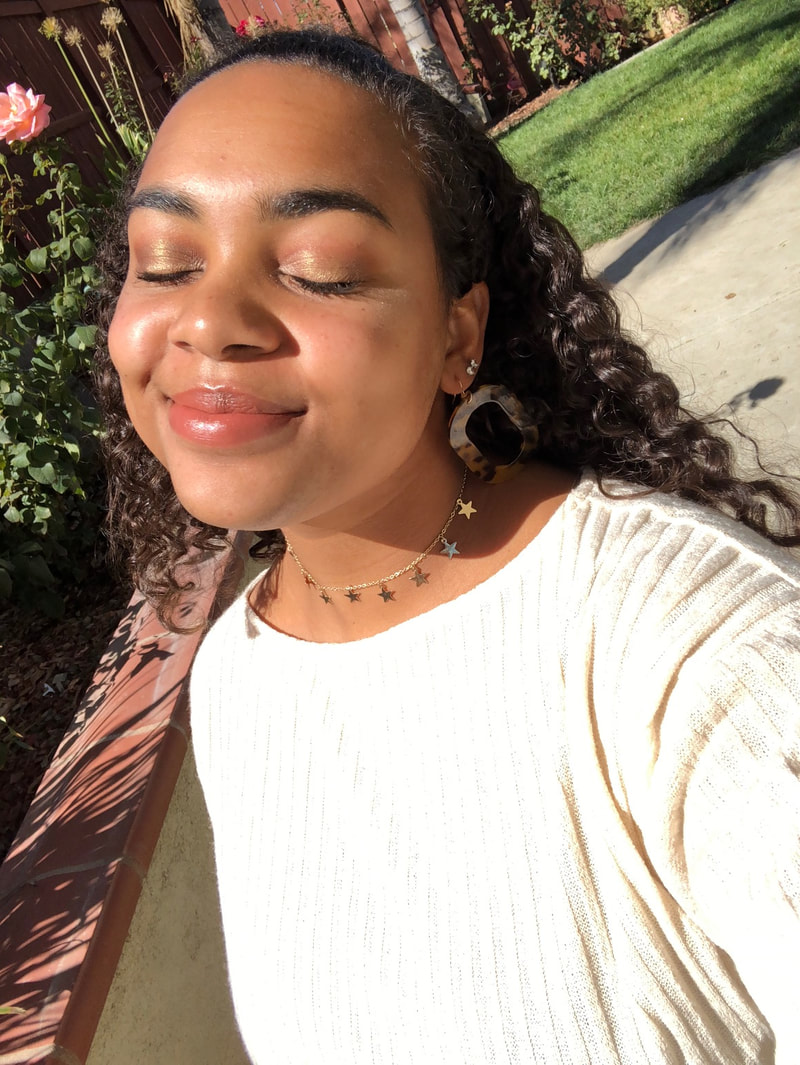 In this photo, I am wearing Blushing Brown by E.L.F. which you can find here. This warm brown shade is from their velvet matte collection and it is so creamy and long-lasting! NYX Intense Butter Gloss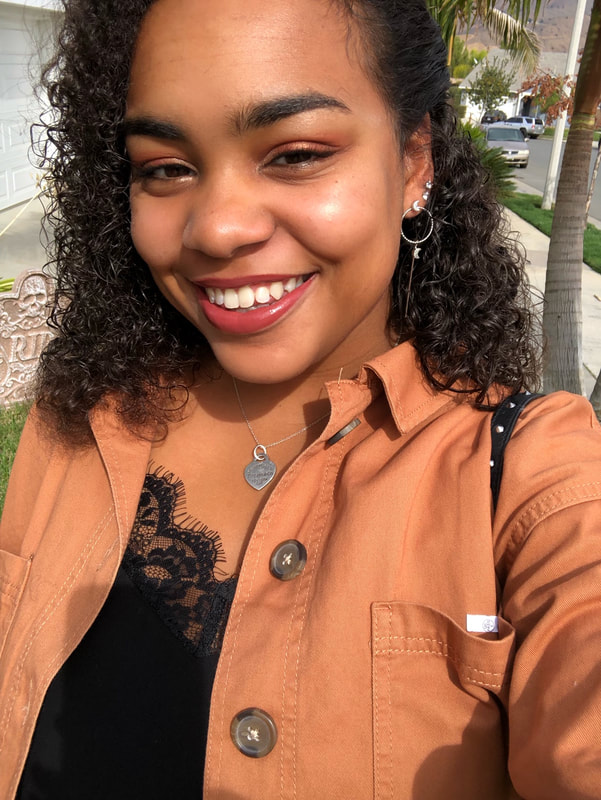 The NYX Intense Butter Glosses are hands-down my favorite glosses. They are so creamy and even more pigmented. This particular shade is called Chocolate Crepe and it is a warm brown with a slight pink tone. While these glosses do need to be reapplied throughout the day (as many do), it never piles up like lipstick, so layer away! Urban Decay Lipstick This UD Vice lipstick is in the shade 1993 and it is a comfort matte. The lipstick goes on smooth and doesn't crumble or dry out my lips like a regular matte lipstick. This shade is a cool-toned brown and great for a gloomy, fall day. Shop Here:What are your favorite shades to wear in the fall? Let me know down in the comments below and have a great weekend (:
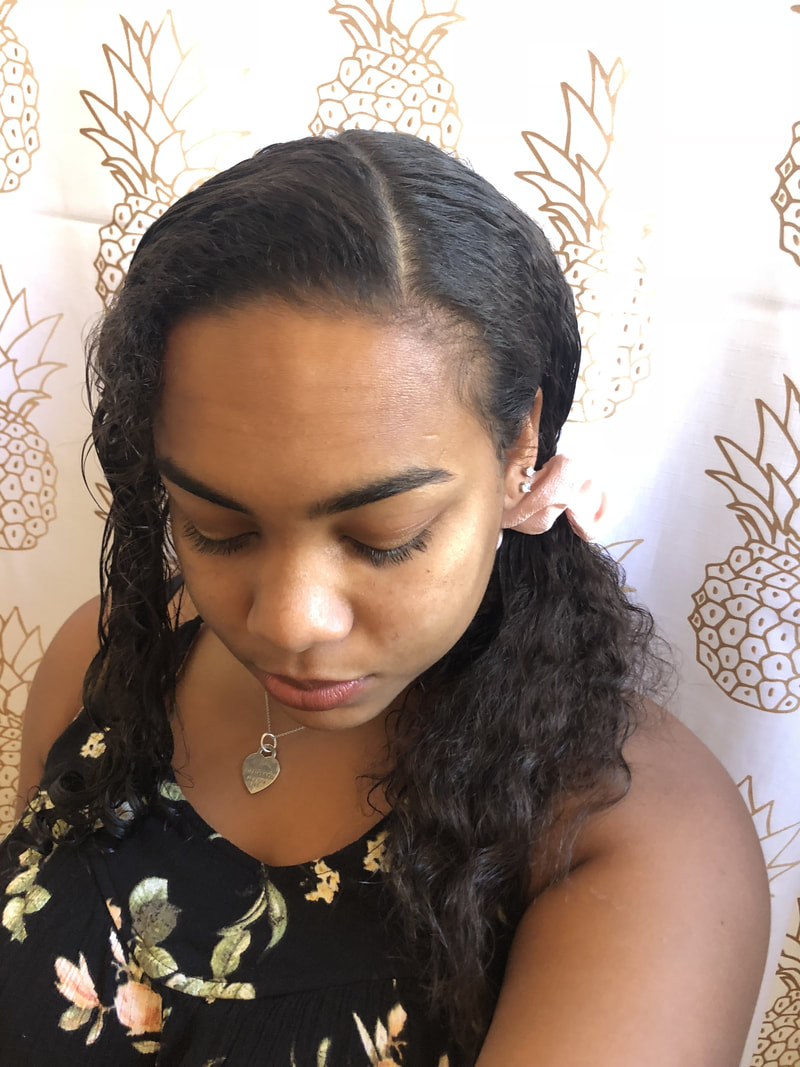
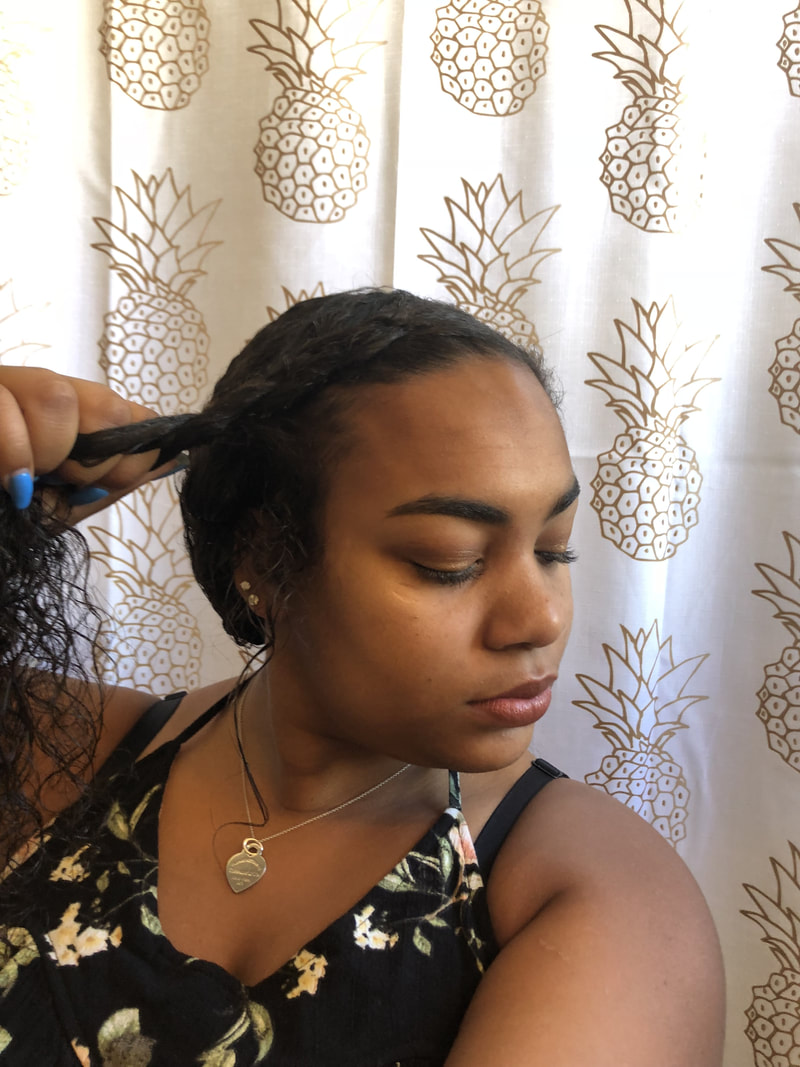
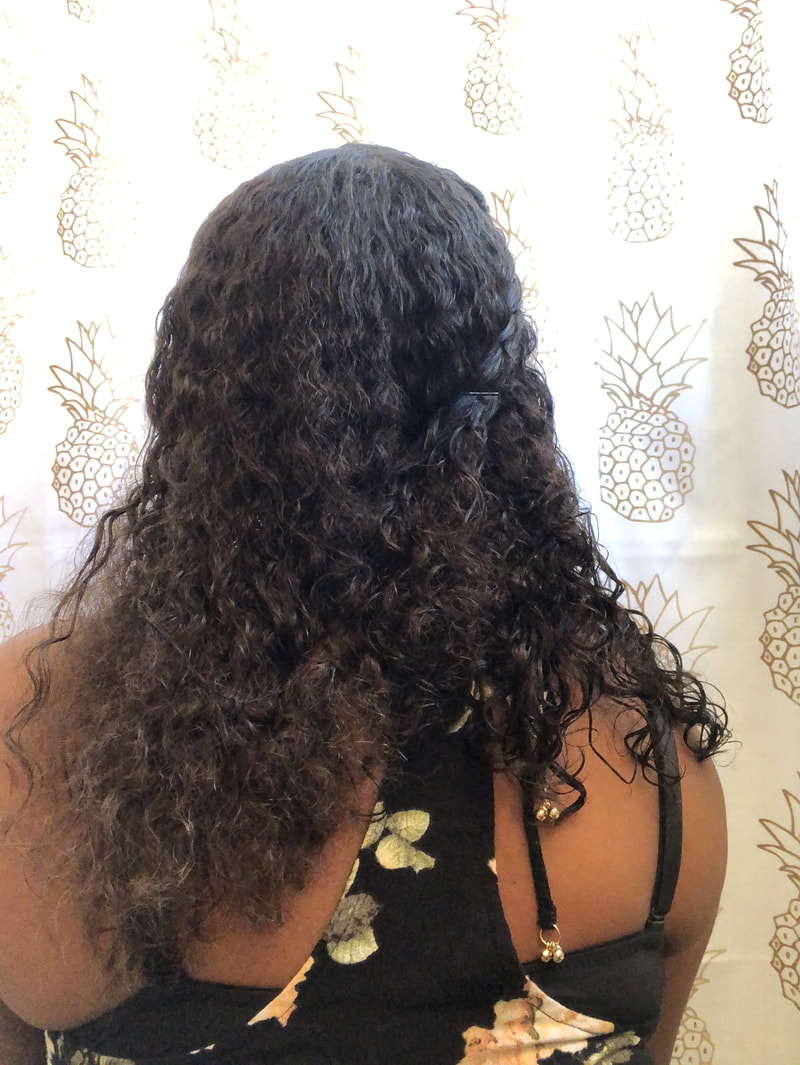
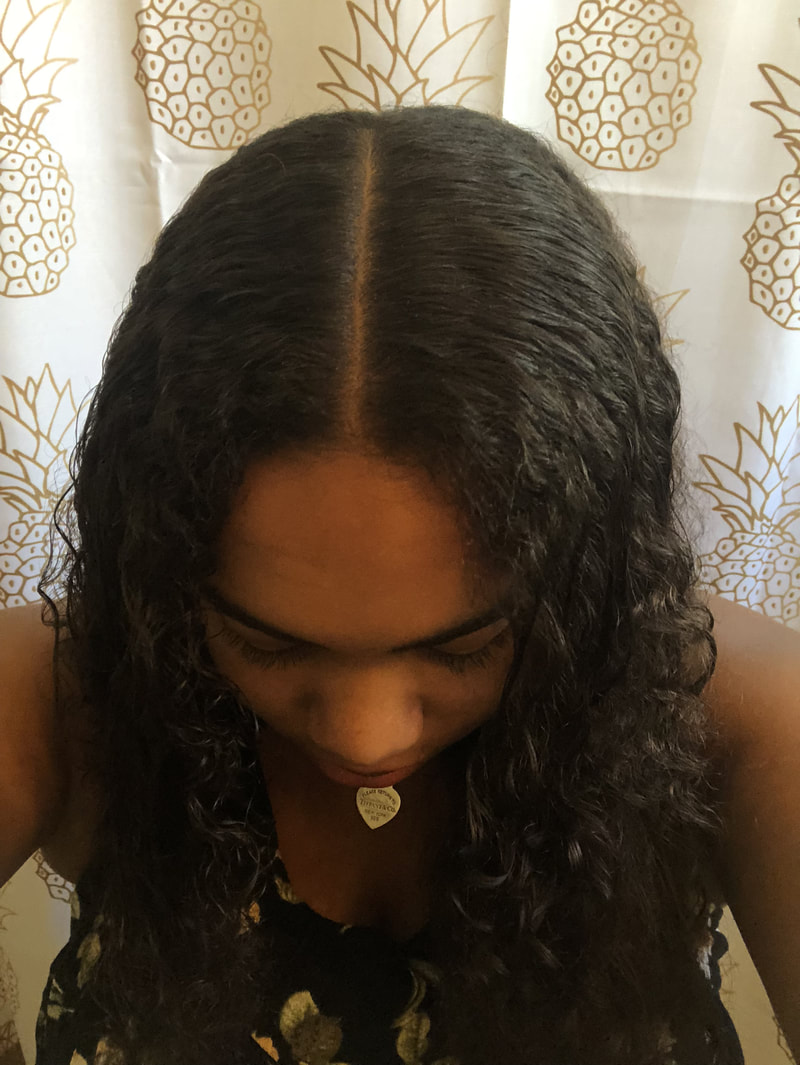
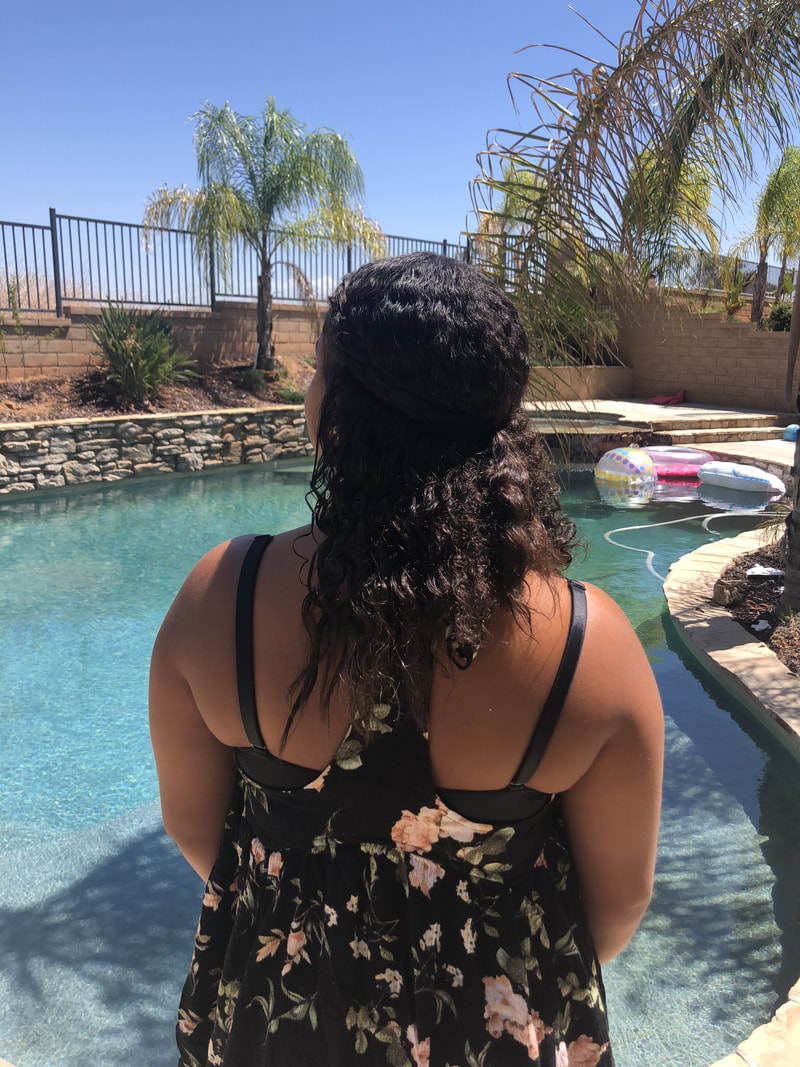
xx star  Hello, everyone! As fall is rolling in and the weather gets cooler, taking care of our hair is especially important. During fall, my hair is dryer than in summer, and I find that I don't need to wash my hair as often. Today, I am going to share with you my curly hair routine and favorite products for keeping my curls moisturized and intact! 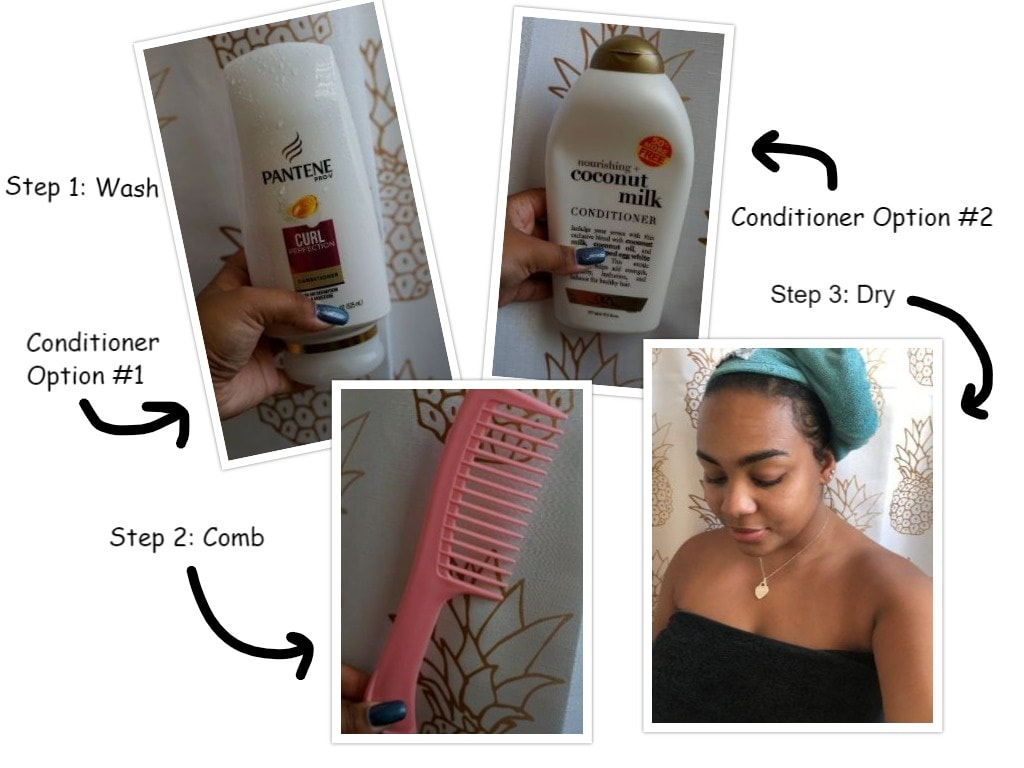 For me, a good hair day always starts with a wash! I will use either one of my two favorite conditioners (or, sometimes, both!), the Pantene curl perfection, or OGX coconut milk. Personally, my hair only gets worse with shampoo so I almost never use it, but if you choose to shampoo first, that's totally up to you! Both of these conditioners smell amazing (especially the coconut one!) and make my curls soft and moisturized. Next, I like to comb my hair with a wide tooth comb while my conditioner is still in my hair so that it combs through easier. This also reduces the amount of hair pulled out. Finally, I part my hair and then wrap it in my hair turban. I do this by putting the towel on like a hood and then twisting the bottom, so that my hair remains down (as opposed to flipping my head upside down and moving my hair to the front). This will help to keep the part in place and make styling my hair easier (**I do this when I plan on wearing all or most of my hair down. If I were doing a high ponytail, for example, I would dry my hair upside down). I leave the towel on for about 5 minutes, but this can change depending on the length and thickness of your hair. Just try to dry your hair long enough so that it isn't dripping, but not so long that it isn't damp. 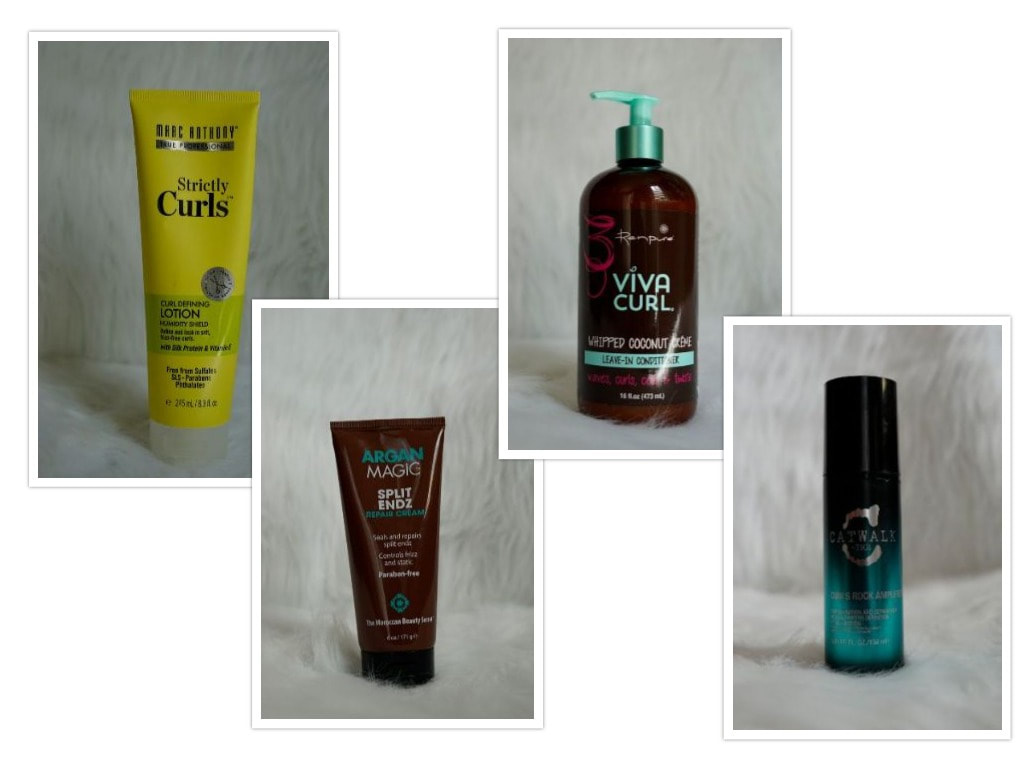 1. Marc Anthony: Strictly Curls 2. Argan Magic: Split Ends Repair Cream 3. Viva Curl: Whipped Coconut Leave-in Conditioner 4. Catwalk: Curls Rock Amplifier 1. I use this product to give my hair that "wet" look and keep my curls moisturized throughout the day. Pro: this product lasts all day! Cons: Can make hair crunchy if too much is applied, must be washed out. 2. I use this product on my ends to keep them from drying out or becoming worse. Pros: Smells nice, hair soaks it up and I don't have to wash it out. Also, keeps my flyaways down! Con: Will not repair split ends. 3. I like to mix this product with the curl cream and apply them at the same time. Pro: Helps to keep my hair moisturized all day. Makes my hair appear healthier and gives it shine. Does not have to be washed out! Con: none 4. I like to use this product specifically on my straight ends to make them curl again. I show you how I use it below! In this first photo, my ends are too long which makes one side of my hair appear longer than the other! I add some of my Curls Rock Amplifier to my hands, scrunch them up, and my ends are curled again *phew. Pros: Curls last and it works! Cons: Product is a little sticky on your hands. That's it! Okay, it seems like a lot, but really it takes ten minutes including drying time. What's your favorite hair product? I'd love to try something new!
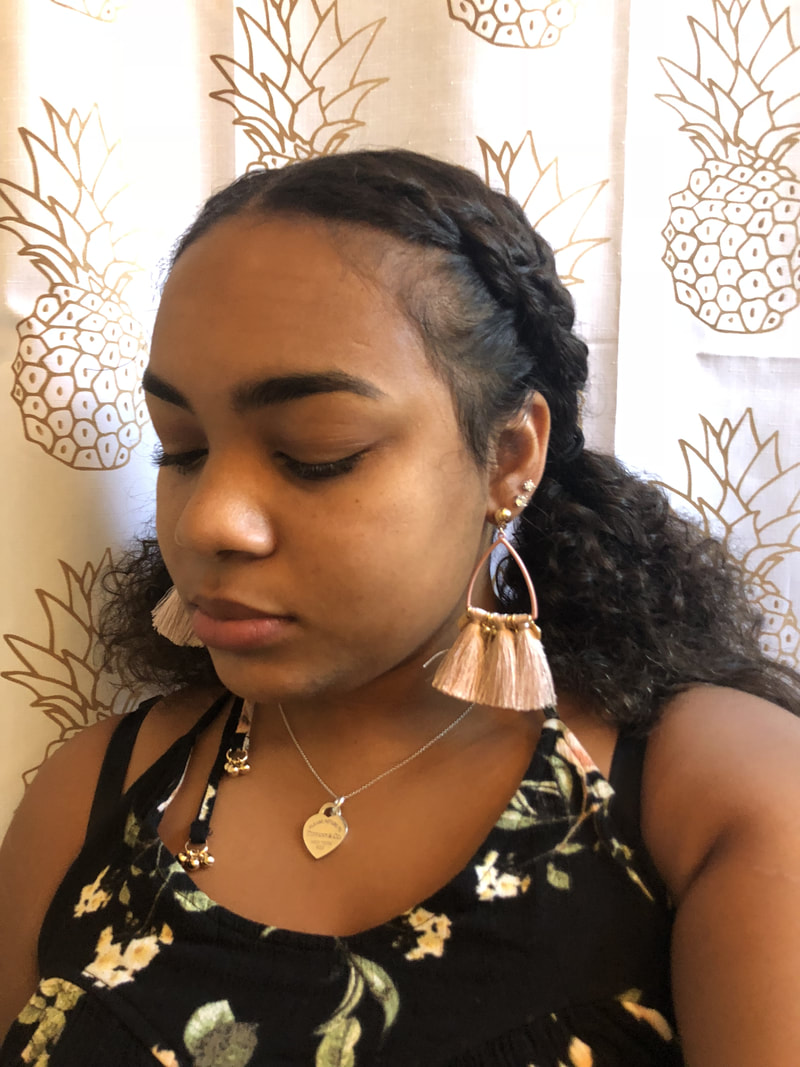
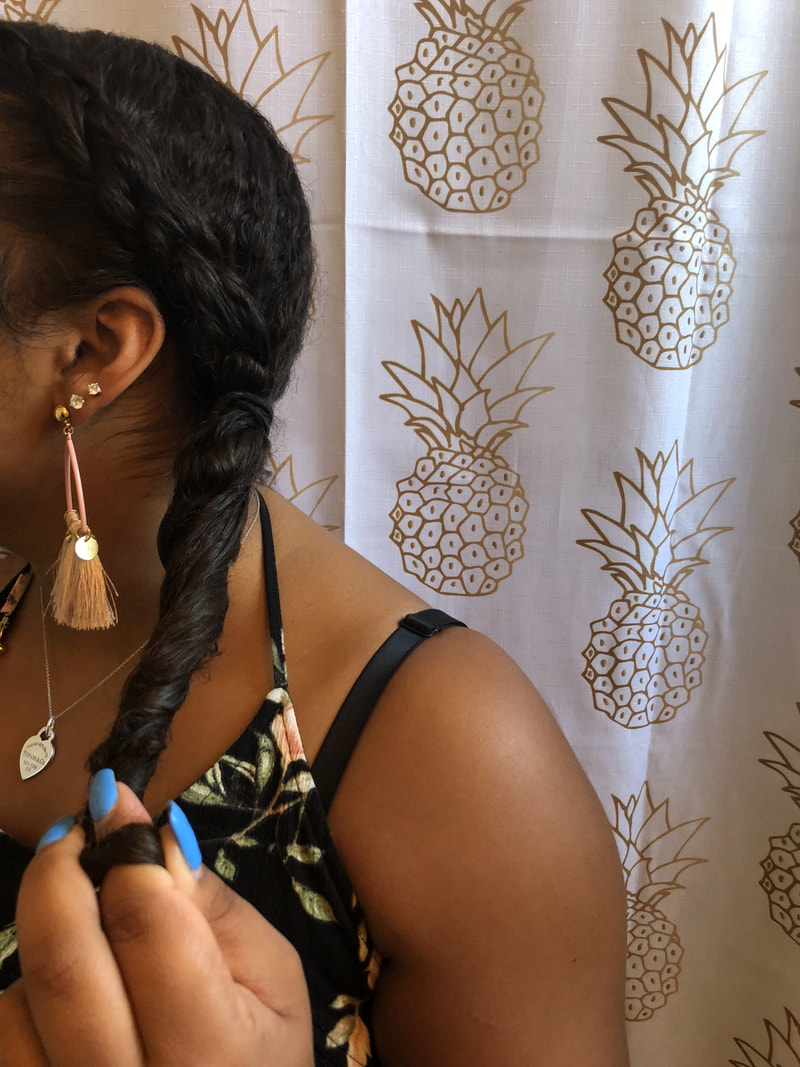
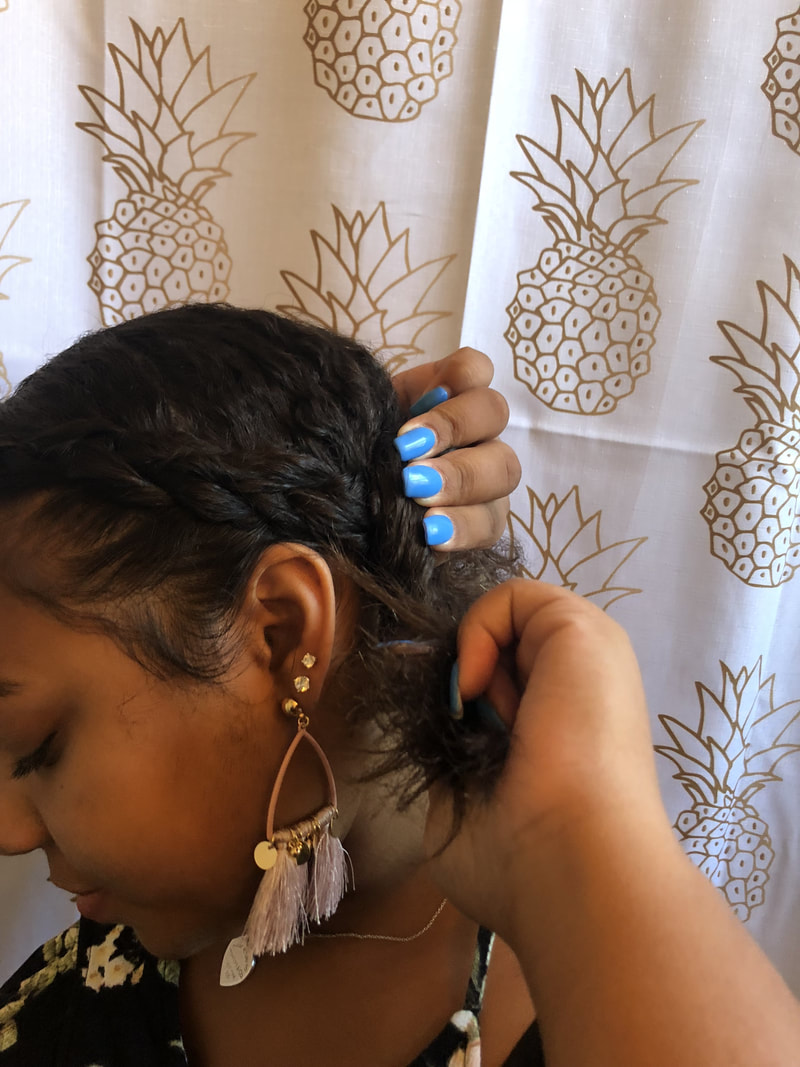
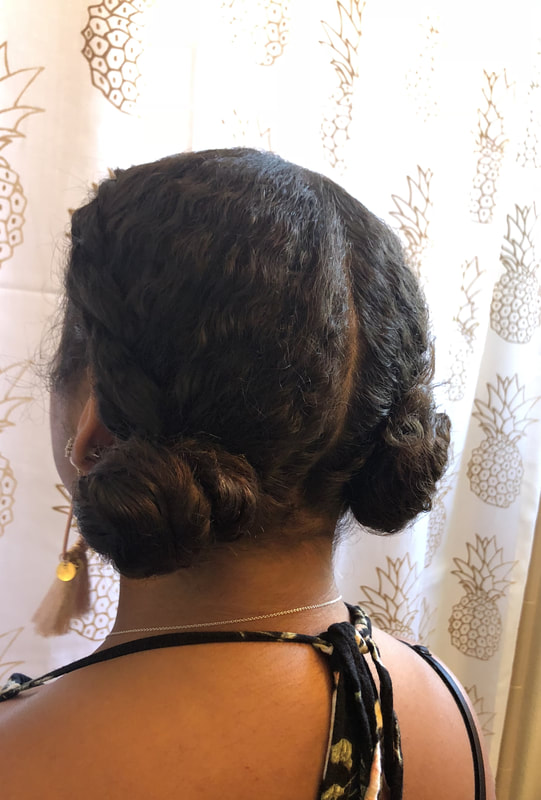
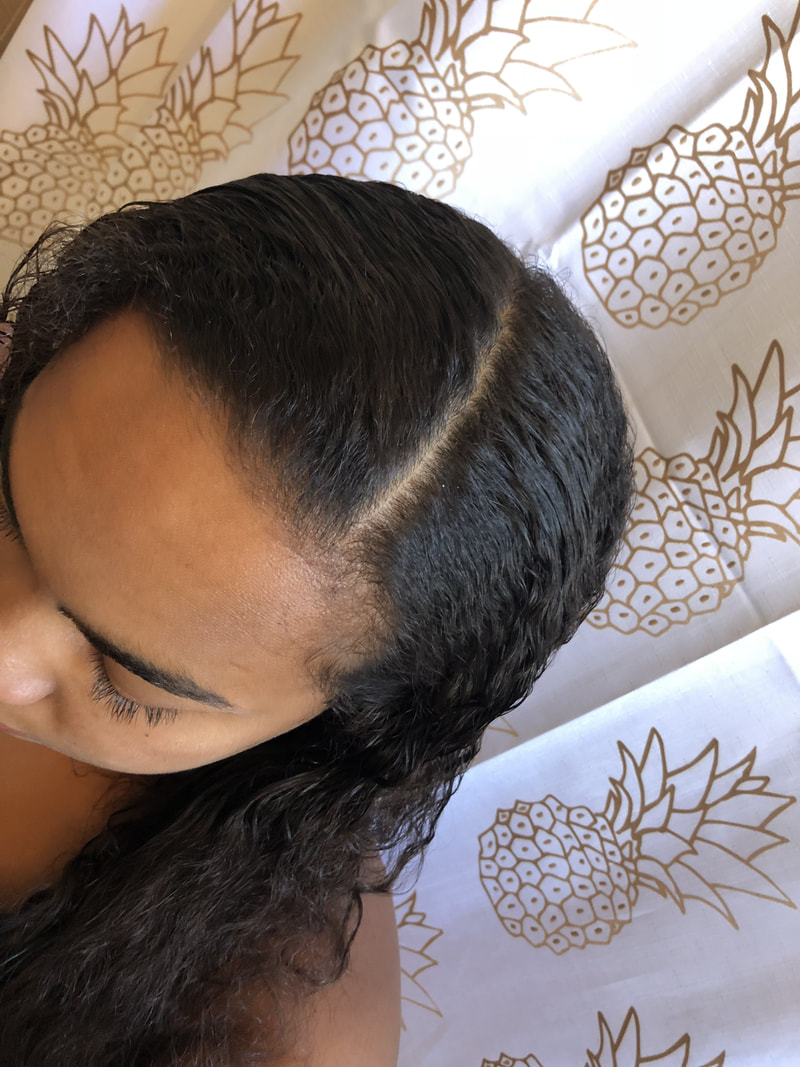
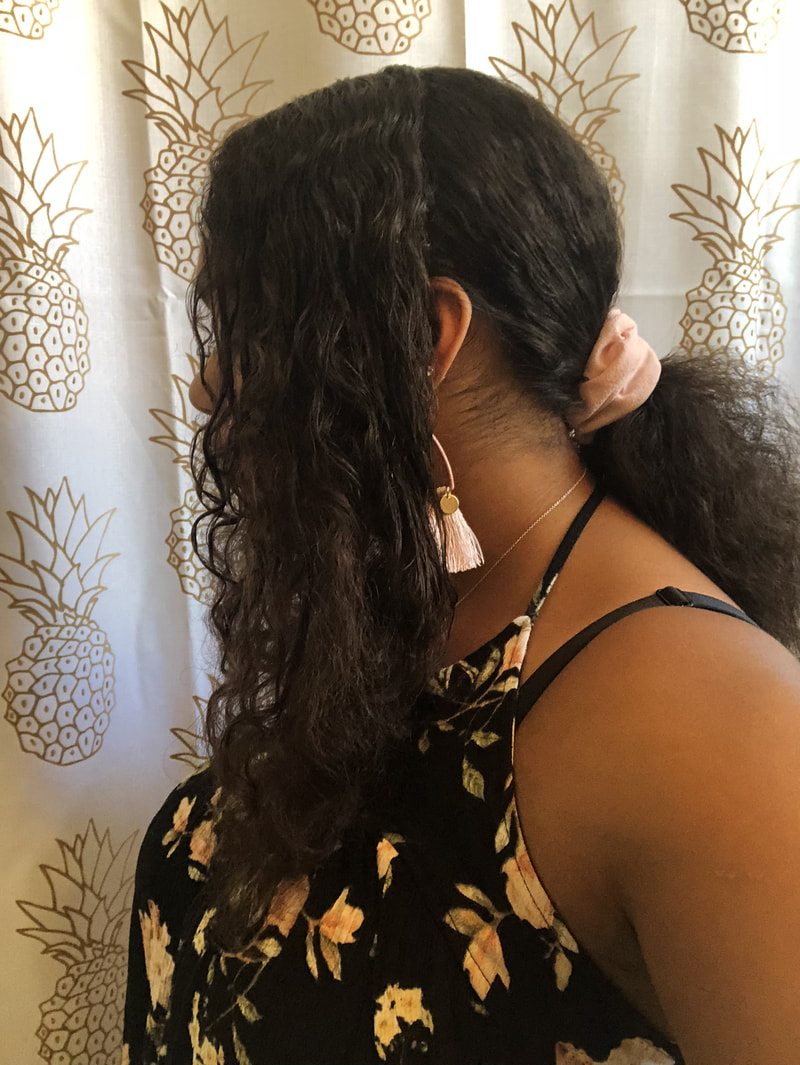
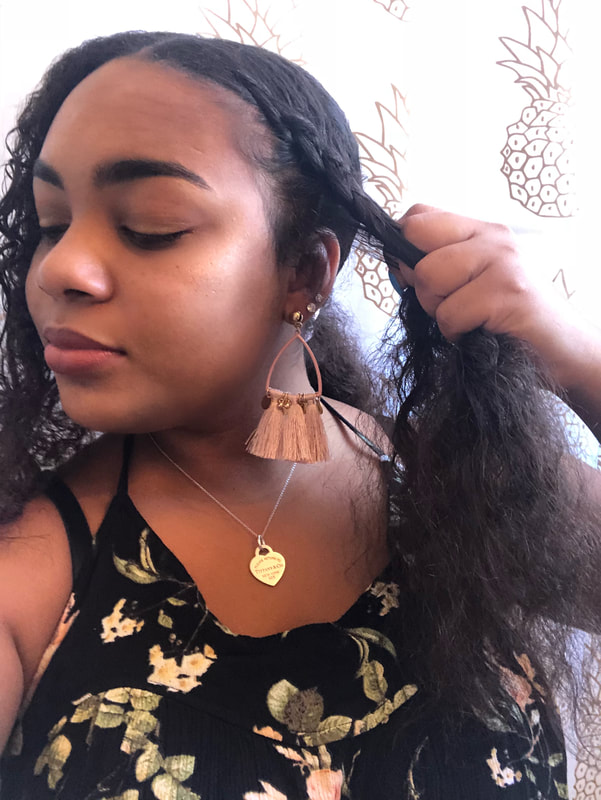
xx Star As someone who had to wear a uniform for the majority of their childhood, I always loved switching up my hairstyle. It was one way for me to stand out and express myself among a sea of students in collared shirts and khaki pants (cue the painful flashback). In fact, I would even challenge myself some weeks to not wear the same style twice! It's safe to say that, over the years, I have tried many different styles and try to switch them up as often as I can on my Instagram. Today, I wanted to share some of my favorite, no nonsense hairstyles that will make you look chic, and get you out of the door asap! STYLE #1: Bubble ponytail This first style is fun and easy! Begin by placing your hair in a ponytail. I like a high pony, but you can do a low pony if you prefer (which works best for shorter hair). Once you secure the ponytail with a hair tie, take small rubber bands and tie them around even sections of hair until you reach the tip. Next, lightly pull the hair in each section to form a bubble and you're done (: Style #2: Braided space buns If you follow me on Instagram, then you've probably seen this style more than a few times. It takes less than five minutes, but instantly dresses up any outfit. Start by parting your hair from front to back either straight down the middle or to the side (as pictured above). Next, braid each side to the nape of the neck and secure with a hair tie. Take each ponytail and twist them into two buns. Secure the buns with a small rubber band, and you're finished! Try this style with hoops or statement earrings and a high neck blouse for an instantly chic look! style #3: Side braid I love this hairstyle because it keeps my hair out of my face on those windy, summer days. Start by creating a side part, and then section a part of your hair just behind your ears. I like to secure the rest of the hair in a ponytail to keep it out of the braid. Finally, braid the loose hair, and secure at the back with bobby pins. Take your hair down and you're ready to head out! Style #4: two piece crown braids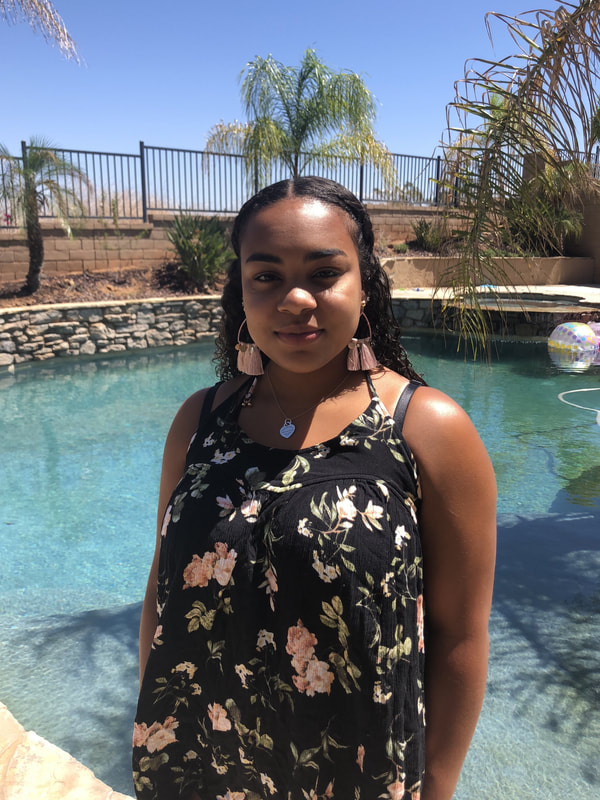 This hairstyle takes the most time out of the five styles, but is still pretty quick and very easy. Begin by parting your hair down the middle, but stop once you get to the crown (just above your ears). Now, drag your parting tool down towards the ear on each side, and secure the rest of the hair to keep it from getting into the other sections. French braid each side to your ear and then continue to do a regular braid. Finally, secure the two braids with a rubber band to hold them in place at the back of your head. I like to add a few bobby pins to hold the hair in place. Finally, remove the larger section of hair, and you're done! Style #5: Add a hair accessory 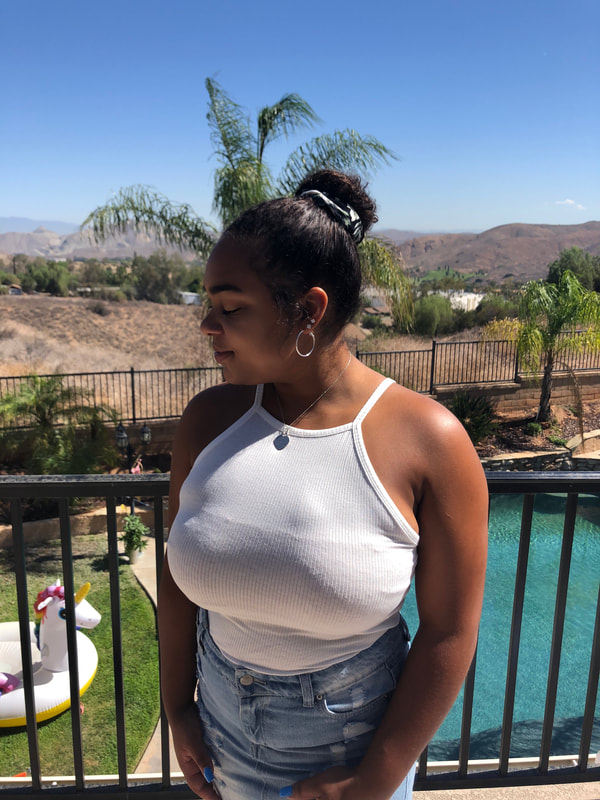 Whew. Are you still here? That last style sounded a bit more complicated than it is. I promise! This final hairstyle sounds and is the easiest of them all. Begin by putting your hair in a high or low ponytail or bun. Next, add a hair accessory, and that's literally it! The hair accessory adds something special to an otherwise simple hairstyle which I love for days when I'm running late. I styled a ponytail and bun with different scarves, but there are so many hair accessories to choose from, so I linked a few below! 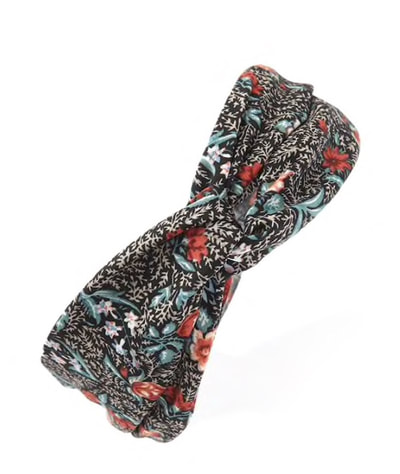  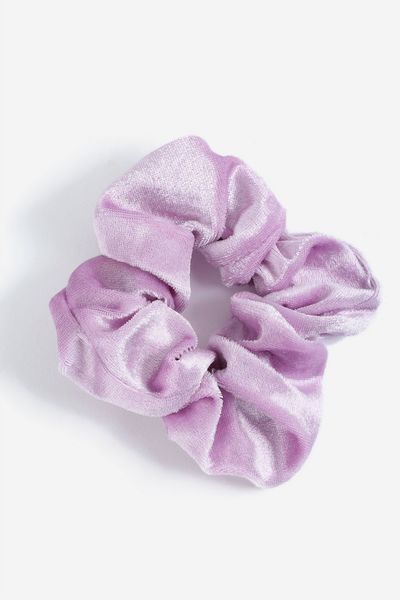 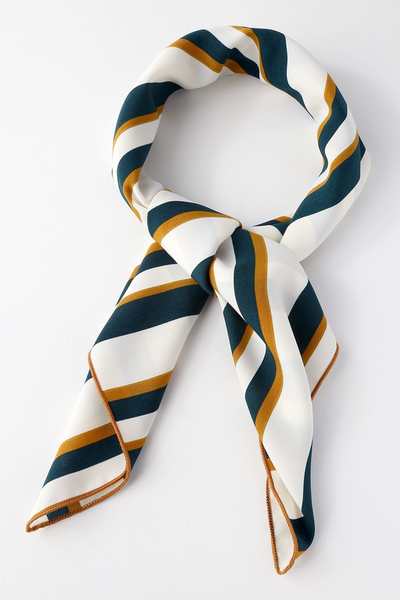 That's it! Of course, these hairstyles are perfect for any time of year, but I really do love braids in the summertime, and buns and high ponies keep my hair off my back when it's really hot (they're also great for showing off those statement earrings!) Let me know which hairstyle was your favorite down below!
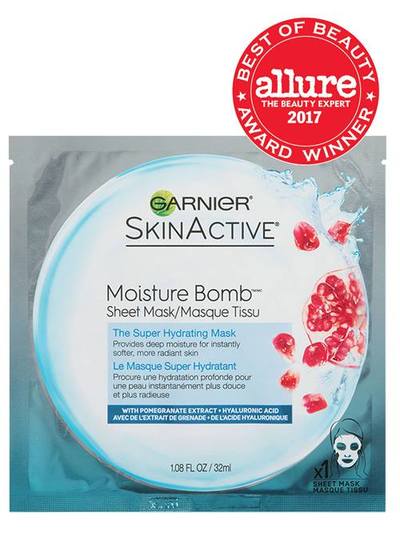
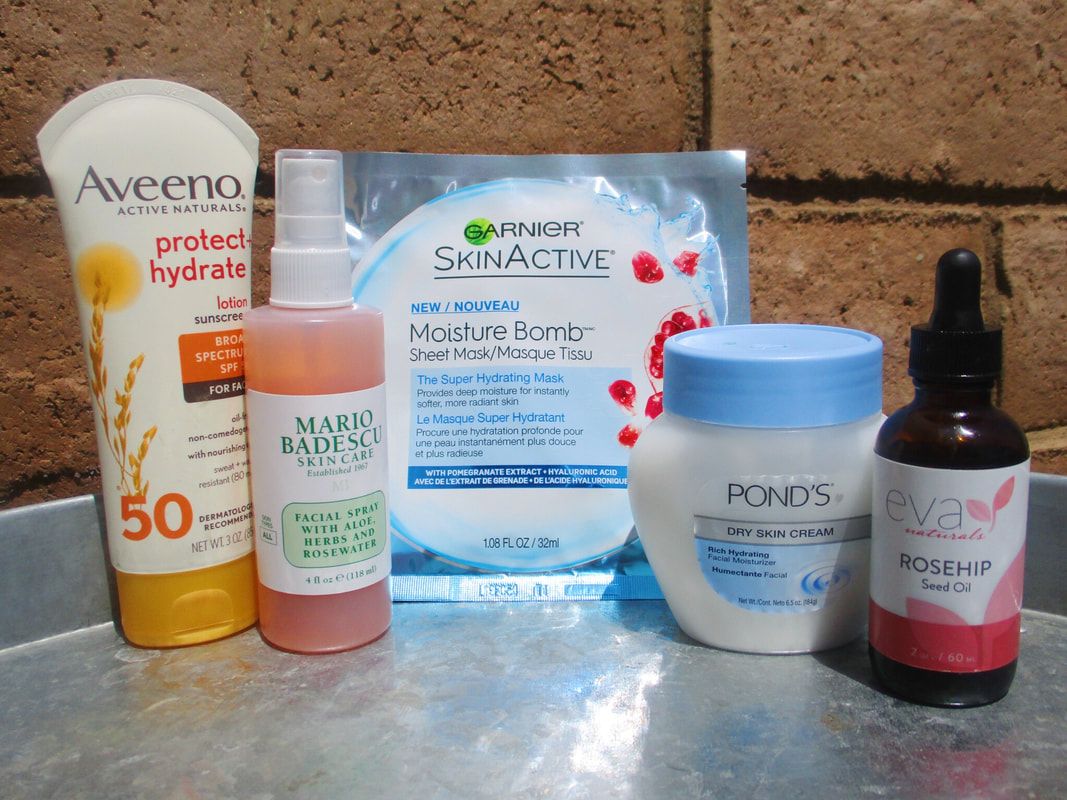 Today, I am discussing my favorite facial skincare products for dry skin. I typically have normal to dry, but, during the summer, my skin tends to lean more towards the dry side. This is because of how often I am out in the sun, and how often I swim (which means more contact with chlorine!) Below, I have linked my top five products that I use to hydrate and moisturize my face, and they are all under $15! My typical skincare routine (after washing my face of course) starts with a hydrating mask, one of the three moisturizing products below, and ends with my favorite sunscreen. Garnier Moisture Bomb: This first product is a sheet mask that can be used in the morning or after a long day just before bed. I have used different masks from too many brands to name, but these are the most hydrating masks I have ever used. They're like a fresh glass of water for your skin! I like to keep the mask on for 20-30 minutes rather than 15 to allow my skin to soak in as much product as possible since the mask does not dry out after the recommended 15.
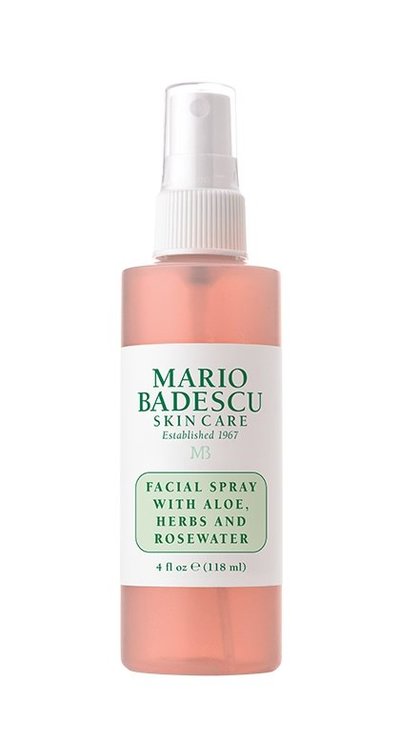
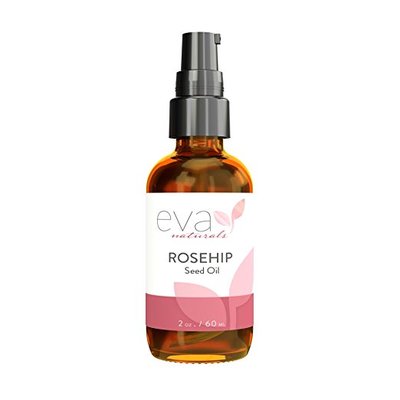
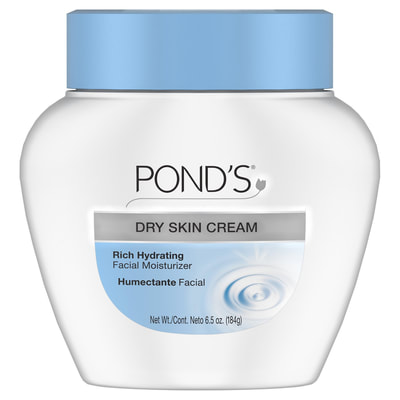
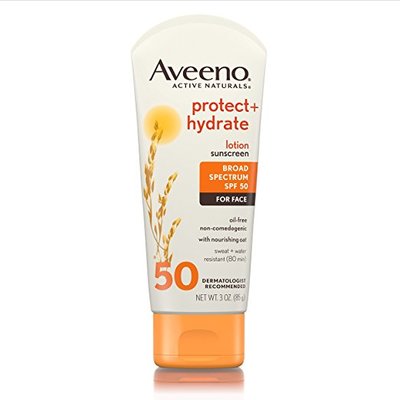
Mario Badescu Spray: While this spray is the least hydrating of the next two products, I like it because it is light. It won't make you look oily no matter how much you use, so you can apply more or less of the product depending on your skin needs. It is also easy to carry with you and reapply throughout the day. This is a good product to use on normal skin days, but on days when my skin is dry, I will reach for one of the next two products. Eva Essentials Naturals Oil: This product is meant to boost collagen and lighten acne scars which is why I bought it in the first place, but after a few uses, I discovered that it helped hydrate my skin as well! It is heavier than the spray, and makes me look oily if I use too much. However, when used in moderation and rubbed in really well, it gives my skin a subtle, natural glow. For this reason, it can be used before bed, or in the morning to start your day! Pond's Dry Skin Cream: This cream is the heaviest of the facial products I have listed, but has been my go to after days in the pool. It moisturizes my skin when it is extremely dry and I can see results immediately, but keep in mind that just a little bit of this product will make you look oily. It is more like a lotion, so a little goes a long way. On my dryer days, I will apply a little on my skin along with primer to hydrate my skin before foundation. Aveeno Facial Sunscreen: Finally, I will apply this product before going out in the sun. I don't sunburn anywhere but my face, and too much sun causes my skin to become extremely dry and peel. Ever since I began using this facial sunscreen, (when I remember) my skin stays moisturized and peel-free! When used in small amounts, it is also light enough to use under foundation, and it smells amazing! |
ABOUTOn this page, you will find reviews and testimonials on new and favorite makeup, hair, and skincare products as well as my makeup and hair looks! Categories
All
Archives
August 2019
|
 RSS Feed
